Editorial office guide
As editorial office, you will have access to many configurations in Nestor. This section provides an overview of the most common configurations and possibilities to administer your journal.
- Categorization of articles
- Configuration of articles
- Configuration of article submission
- Configuration of article types
- Configuration of file types
- Configuration of decisions: the recommendation system
- Configuration of questionnaires
- Configuration of user rights
- The author and the referee profile
- Editor profiles
- Granting editor rights to someone
- Disabling/removing an editor
- Editor profile: decisions and proposals
- Editor profile: responsibility (in charge)
- Configuration of e-mail templates and reminders
- Overview of the template configuration
- Editable / automated e-mails
- Creating a new e-mail template
- Drafting templates with variables!
- Drafting templates with conditions!
- Attaching rules to templates
- Notification bells
- Configuration of automatic reminders
- Creating a request for revision (to the author)
- Statistics
- FAQ
Categorization of articles
Standard categorizations
Nestor provides a wide choice of tools to categorize articles:
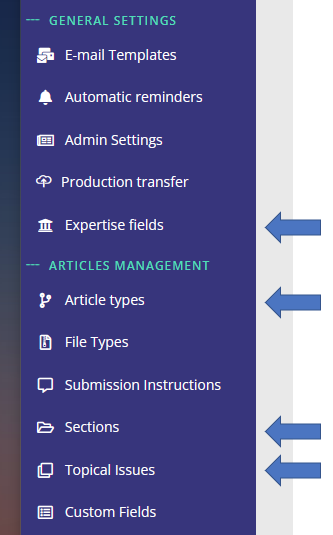
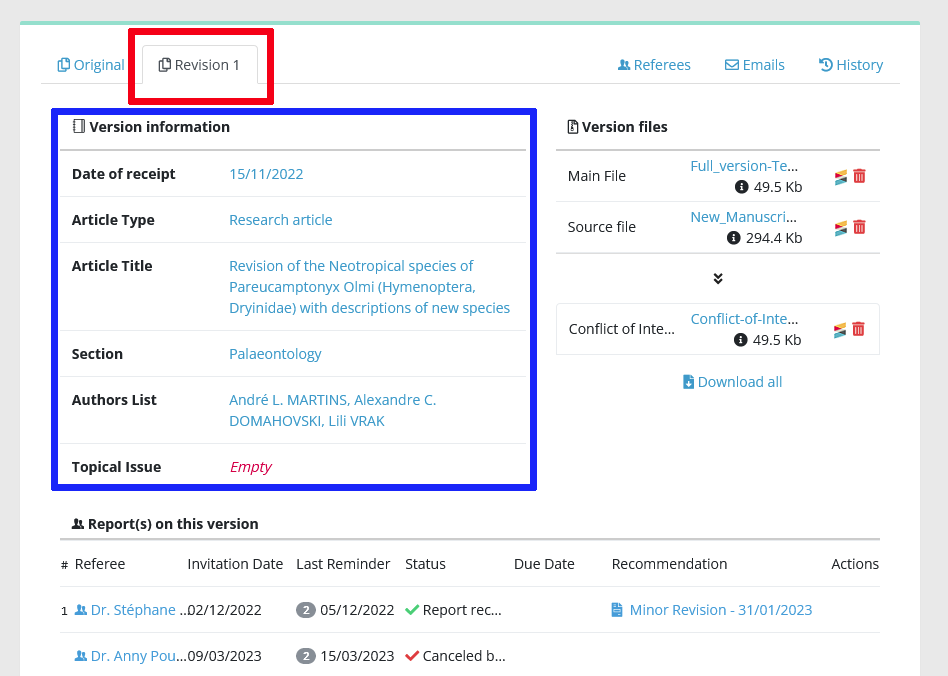
For a specific article, categories are available and may be corrected in the metadata module.
| Category name | Particularities |
| Expertise fields |
|
| Article types |
|
| Sections |
|
| Topical issues |
|
These categories may be used in combination to:
- handle specific workflows (especially article types and custom fields)
- perform specific searches on articles
- display visual flags on article pages and article lists
- process data about your journal
Special categorizations: custom fields
Custom fields are a way to categorize articles in any way besides standard categorizations. They can be quite simple (text, date etc.), or they can be used to create special options related to your journal.
For a specific article, custom fields are available and may be corrected in the metadata module.
Custom fields configuration is available here:
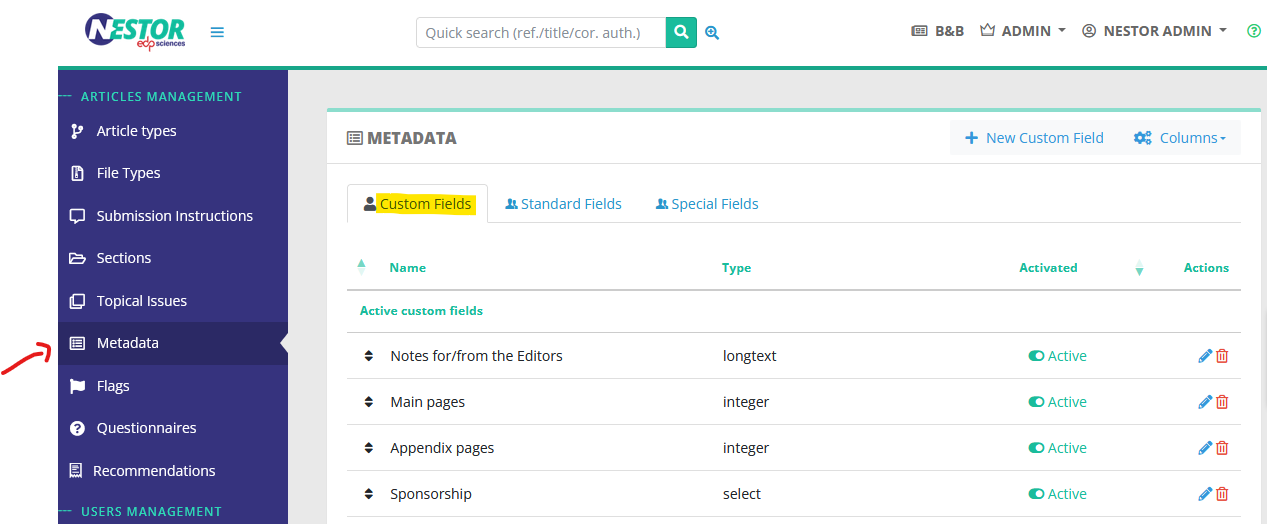
Simple custom fields
There are five types of "simple" custom fields:
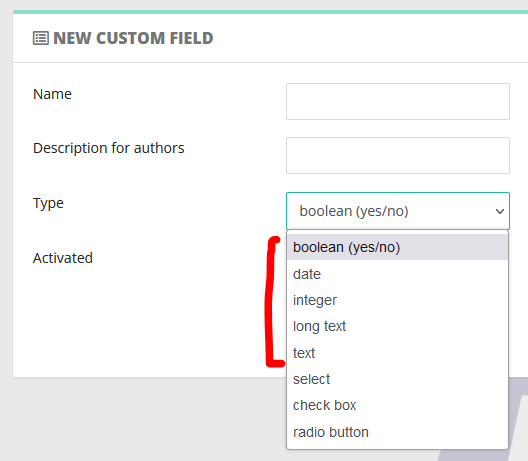
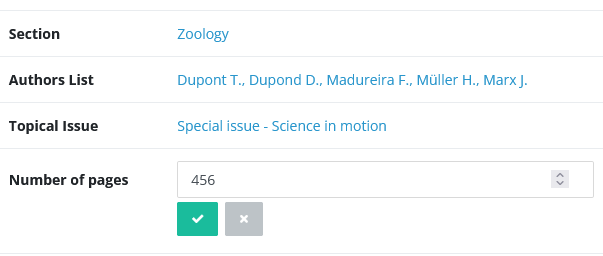
For example, let us imagine that for each article, I want to track the number of pages.
I can configure a custom field accepting only numbers, so:

In the article page, I will retrieve my field and can input the relevant data for this article:
|
|
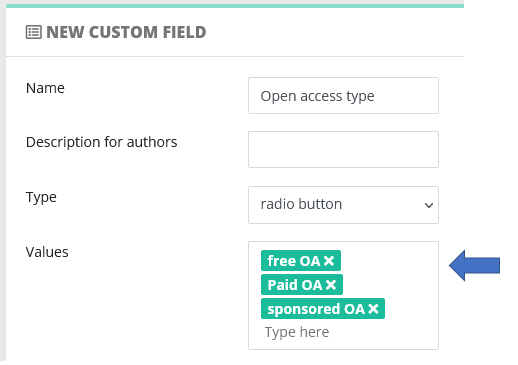
List custom fields
The custom fields select / checkbox / radio are used to create a flat list of selectable options. When creating such a custom field, you will have to provide the corresponding list of options:
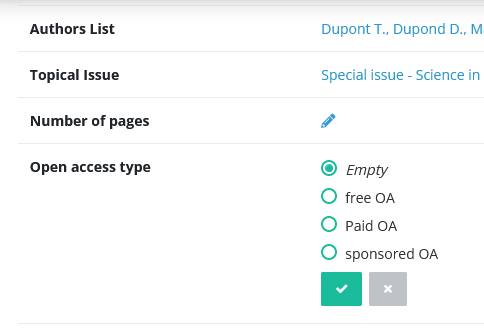
The configured options will then be selectable in the article page:
Custom fields and other tools
- Custom fields can updated automatically:
- Custom fields can be:
- flagged to be displayed prominently on articles
- displayed and exported in article lists
- used in advanced searches, as a criterion
Flags
Flags are symbols displayed on articles, to help editors to identify important information. They are visible both in articles pages and in articles lists.
| Flags on the article page |
Flags in article lists |
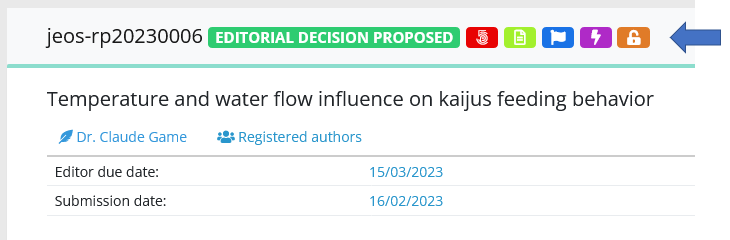
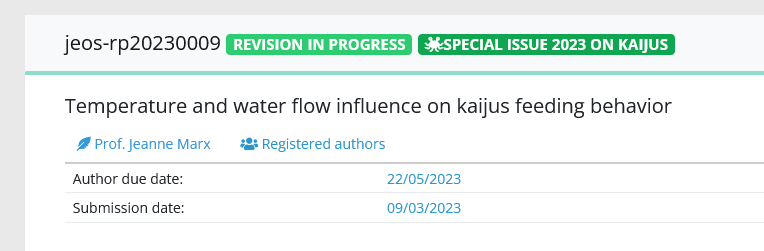
| In article pages, flags are displayed in the upper information area, near the reference and the status |
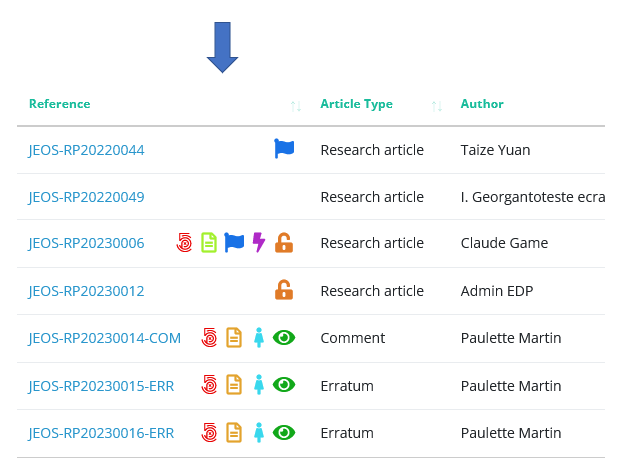
In article lists, flags are displayed next to the reference |
|
|
|
Configuring flags
Flags are based on the article metadata and categorizations. The following data can be flagged:
- Article type
- Section
- Topical issue
- Country
- Any list custom field (select, check boxes, radio buttons)
Flags: a case study
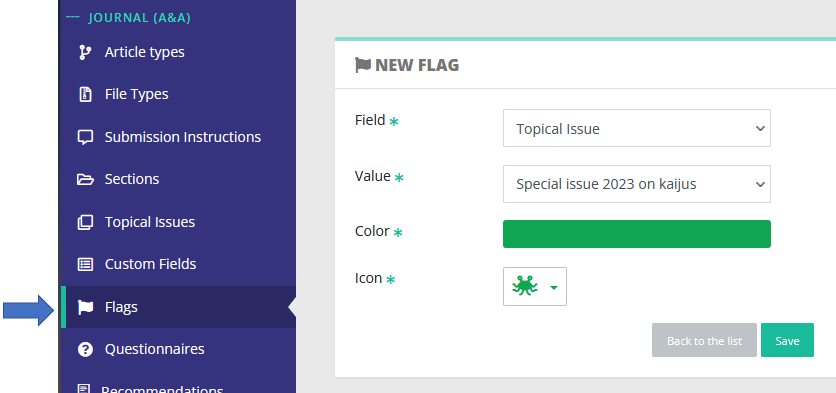
For example, we want to closely follow articles submitted for a 2023 special issue. Let us create this flag:
Any article included in this topical issue will be flagged accordingly:
Data exports
Exporting data from Nestor is a simple process, please have a look here :)
Configuration of articles
This chapter describes how to configure articles in the journal: submission elements, workflows etc.
Configuration of article submission
The submission workflow is the most technical configuration! At the minimum, we recommend to follow the following steps, hang in there:
- File type configuration
- Article type configuration
- Submission instructions configuration
The file type configuration
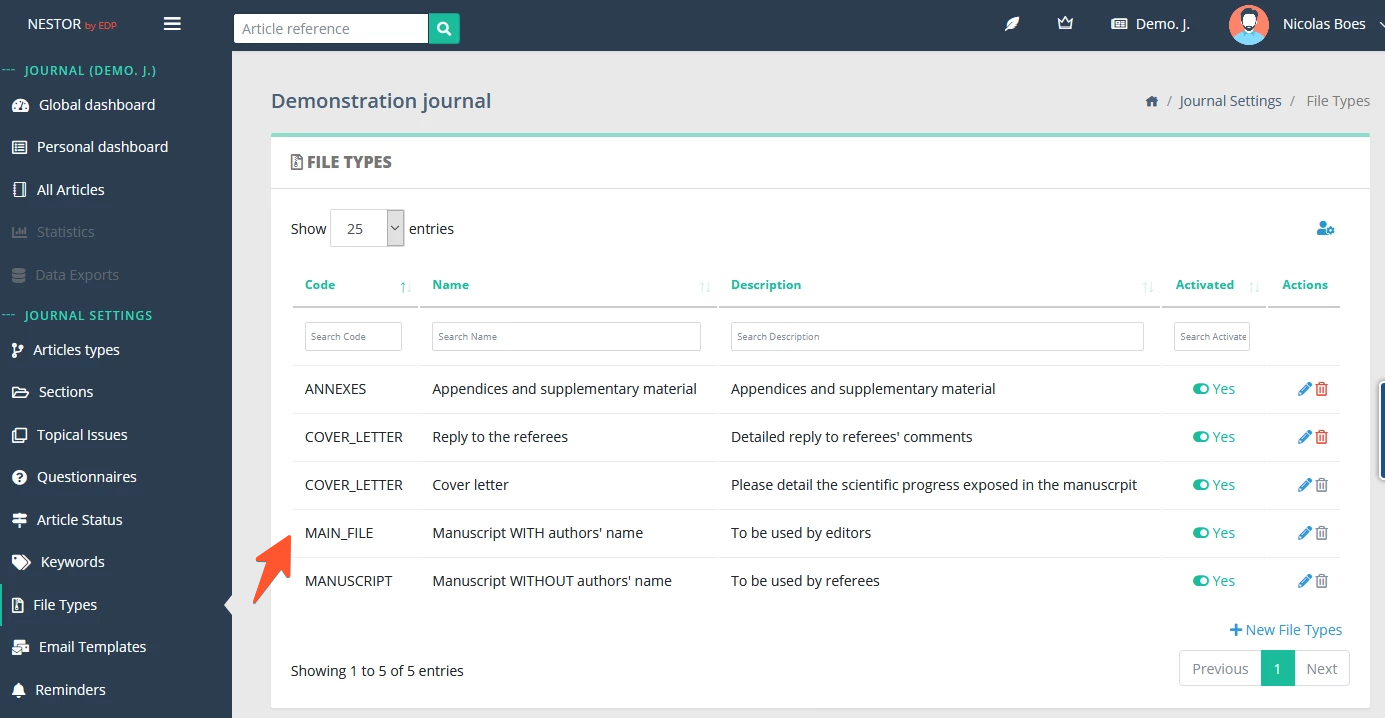
The first step is the file type configuration, where file types are listed, and may be created, updated, or deleted:
Clicking on “Edit file type” will get you to the file type configuration, where the following fields may be edited:
-
Name
-
Visibility by users (editors and referees)
-
Whether this file type will be sent to production systems when the article is accepted

The article type configuration
The second step is the article type configuration, where specific file types may be requested to the author at submission or revision, for a specific article type.
-
Depending on the article type, you may want to require specific files. For example, a cover letter from the authors may not be requested for a preface article.
-
In a given article type, depending on the first submission or a revised submission, you may want to require specific files. For example, a first submission will never require a reply to the referee, while a revised version will often need a reply to the referee.
Thus, for any given article type, this behavior is defined here:

The submission instructions configuration
During the submission process, the author may be guided during each step of the submission.
For this purpose, you may configure specific instructions here:

Configuration of article types
Article types may be configured in the journal configuration, where article types are listed, and may be created, updated, or deleted:
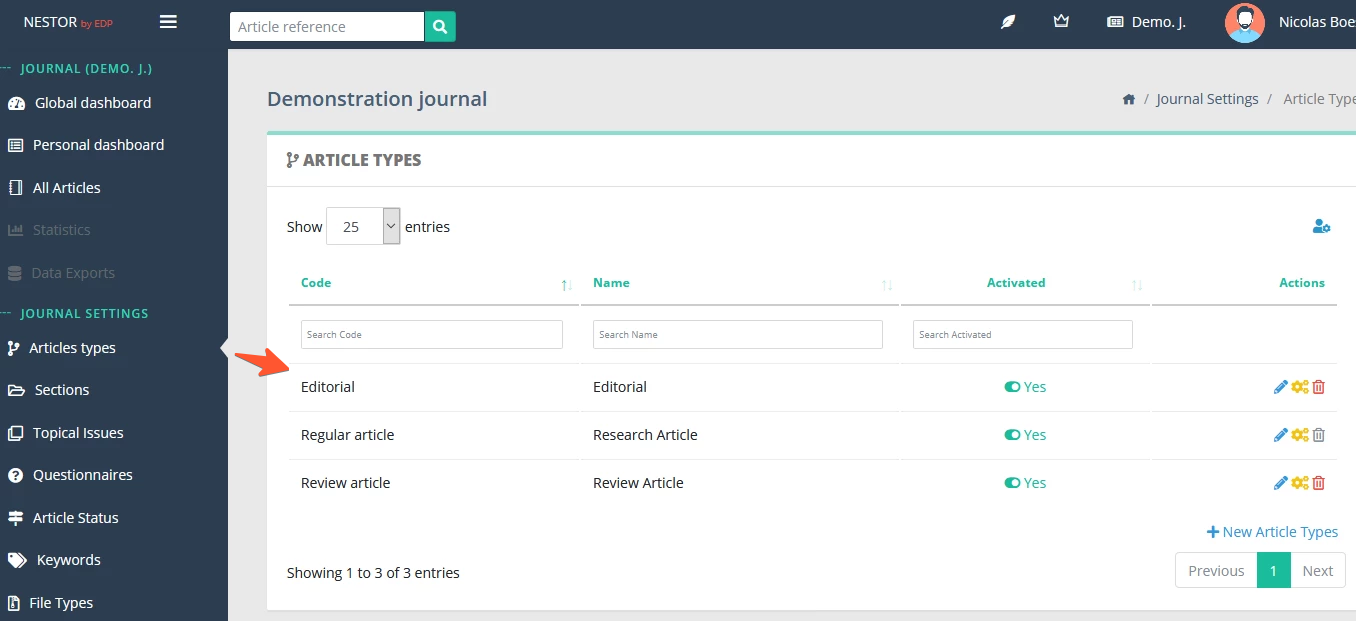
Clicking on “Configure article type” will get you to the article type configuration, where the following options must be edited for any given article type:
-
Information required to the authors at submission (file types, information fields, questionnaire)
-
Due dates for authors and editors: this serve as a basis to compute the status due date and reminders
-
The technical check, if any. When activated, articles with this article type will benefit from a special workflow
-
The peer review: referee due dates, number of reports expected before taking take a decision
Configuration of file types
File types may be configured in the journal configuration, where file types are listed, and may be created, updated, or deleted:

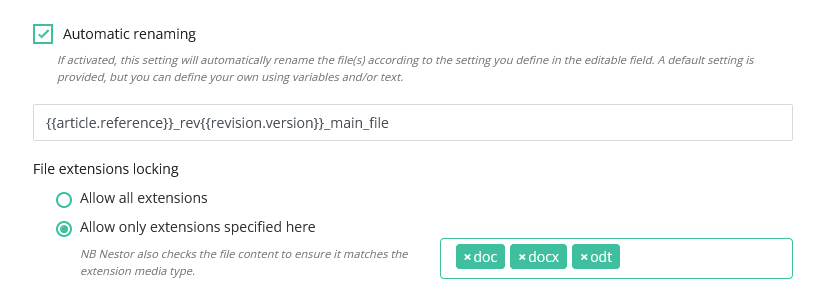
Clicking on “Edit file type” will get you to the file type configuration, where the following options must be edited for any given file type:
-
General setting (labels and activation)
-
Workflow settings, related to submission and Similarity Check
- Automatic renaming and extension checks:
-

- Visibility settings
Configuration of decisions: the recommendation system
Depending on your workflow needs, your journal can use very specific labels for decisions. Some decisions will be related to scientific corrections, others may be related to copyediting or language corrections. In Nestor those labels are called "recommendations". Here are a few common examples:
| Acceptance group |
Revision group |
Rejection group |
|
|
|
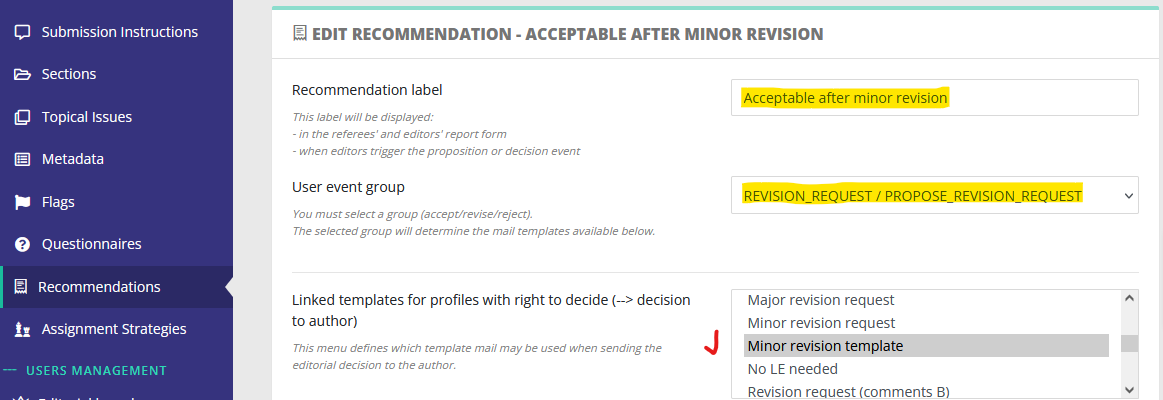
Those labels are freely configurable here:
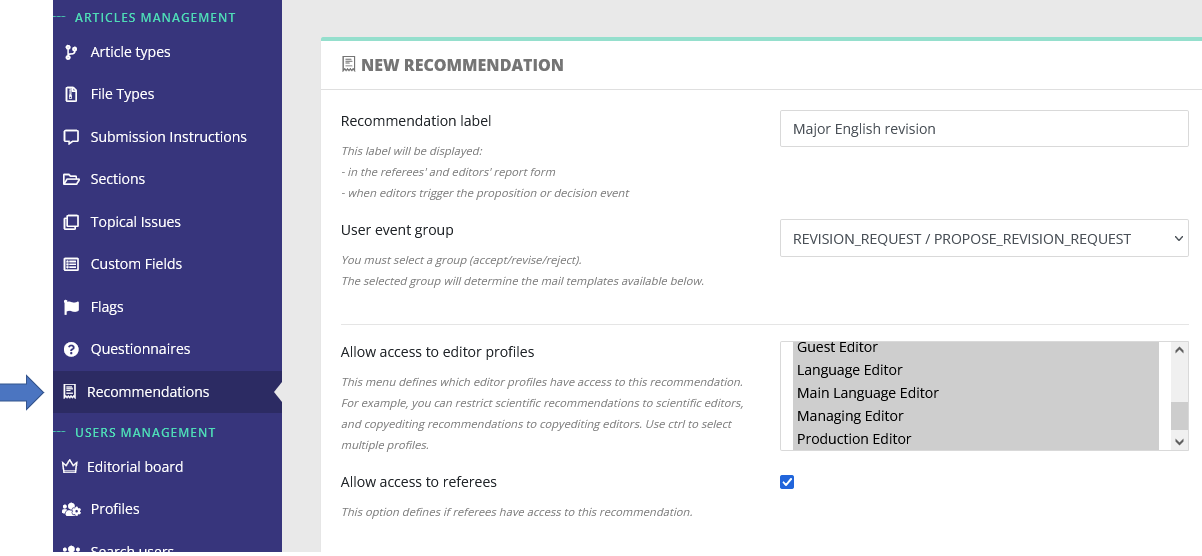
From this page, you will be able to set up:
- the decision label
- who has access to the recommendation (editors/referees). See also the dedicated page regarding decisions and proposals.
- which e-mail templates are linked to this recommendation
Configuration of questionnaires

Writing in progress... ↁ_ↁ
Any enquiries? please contact us: support@nestor-edp.org
Configuration of user rights
The author and the referee profile
|
|
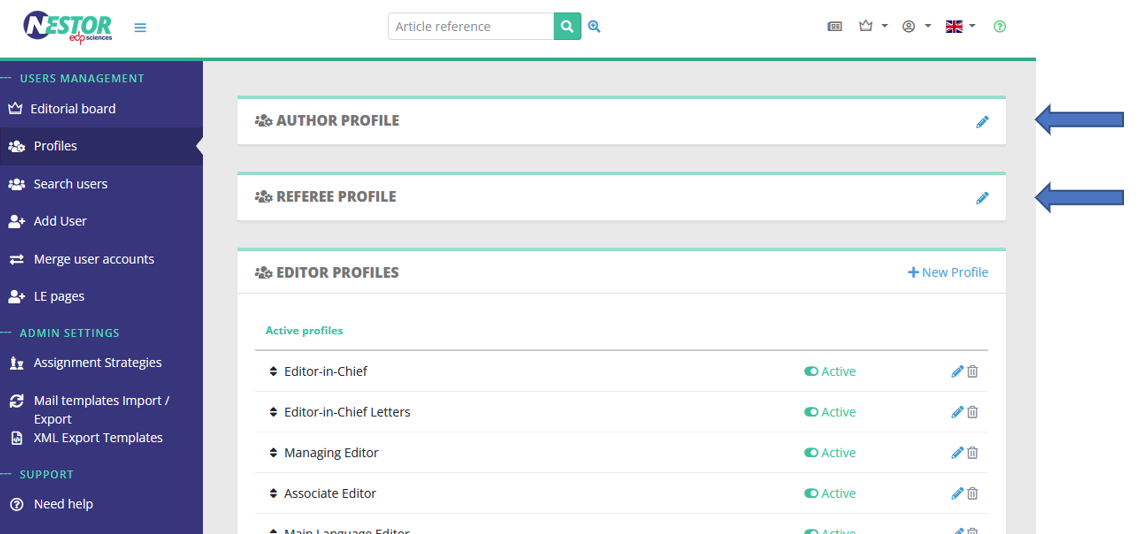
- Open peer review (author profile)

- Single/double blind (referee profile)
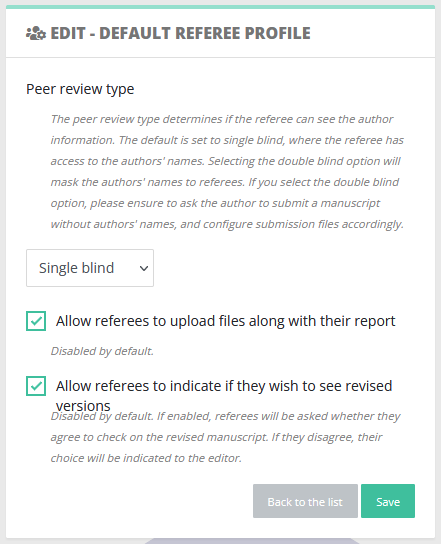
Note that other settings may interest you:
- file types visibility is set up directly in the file type configuration
- visibility during the submission process is treated independently here
Editor profiles
Contrary to the author and referee profile, editor profiles are not unique. It is very common for a journal to configure several profiles, with different sets of rights. The reason is that editor profiles are used by people with different tasks as regards articles. Common examples of profiles are:
- Editor-in-Chief
- Editorial assistant
- Associate editor
- Copyediting editor
- Production editor
The configuration can be found here:

Each editor profile has specific settings. Settings are sorted by family:
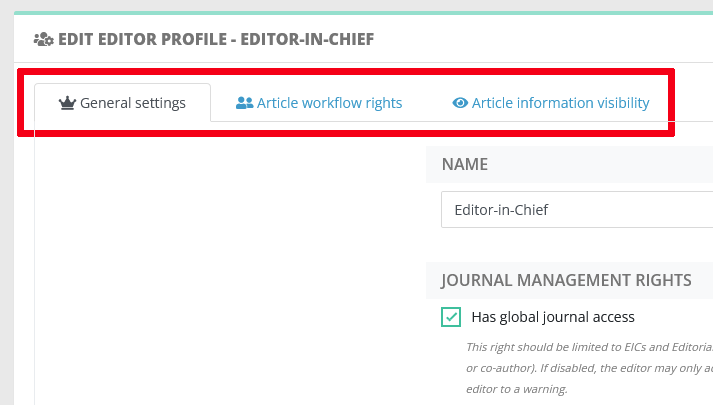 |
- General settings define global journal rights for this profile:
- Access to global information and dashboards
- Access to administrative rights: does the user can configure the journal?
- How does editorial responsibility switch for this profile?
- Article workflow rights define how this profile can interact with an article, especially:
- Can this profile assign other editors? (see assignation workflow)
- Can this profile invite referees? (see peer review workflow)
- Proposing or taking decisions (see here and here)
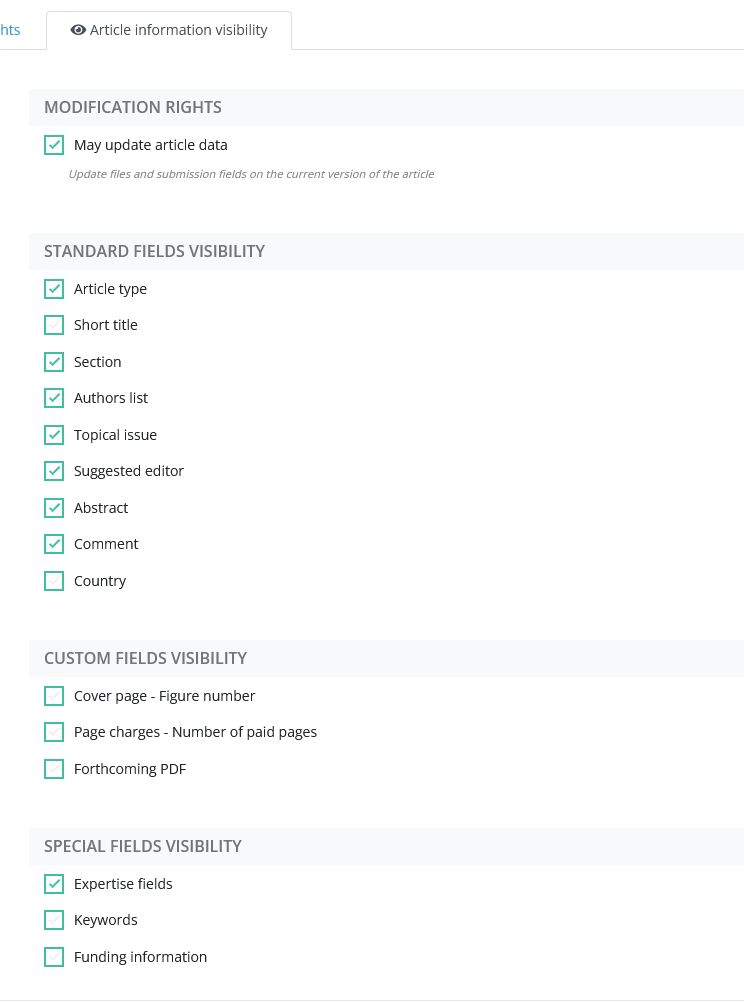
- Article information visibility defines what the profile can see on an article. Indeed, an article can store a lot of different information, sometimes not relevant to all editors. Typically, scientific profiles might not be interested by production or copyediting notes. For this purpose, the profile visibility can be finely tuned here:
|
|
Granting editor rights to someone
To grant an editor access to someone, you must first access the user page. Just click on someone's name in an article or in search results:
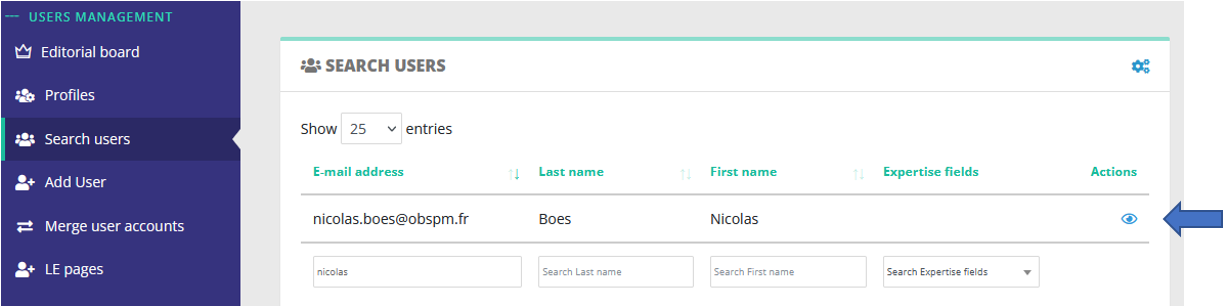
In the user account page, you may simply assign the editor profile here:
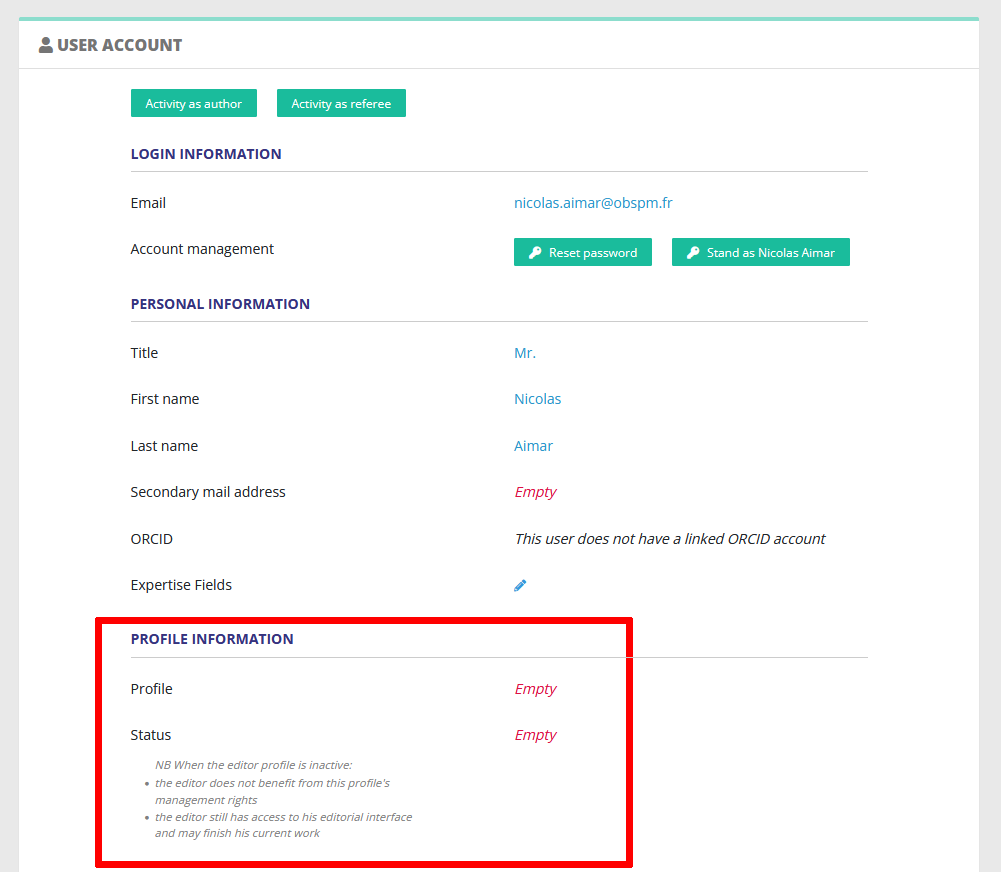
Disabling/removing an editor
When an editor leaves your editorial board, it is recommended to just disable his profile:
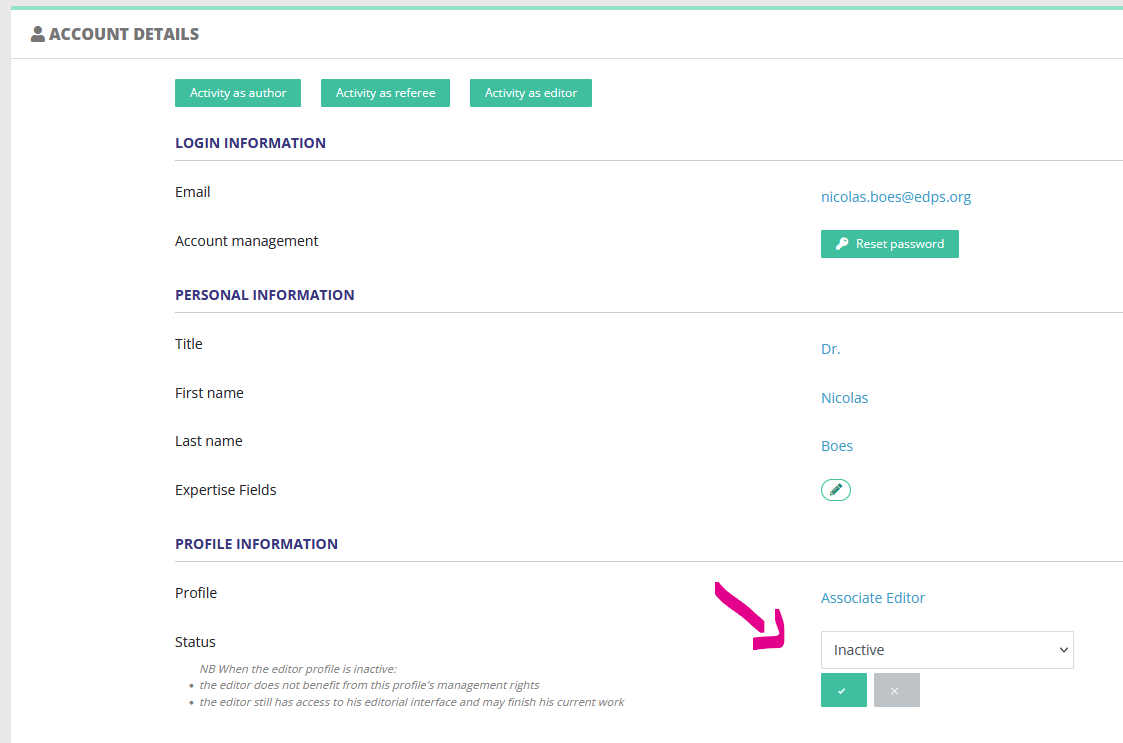
This way:
- The user will still have access to his editing history.
- And most importantly can still finish the editorial process on pending articles where he/she is already assigned.
Note that disabling the profile as indicated will:
- disable most journal management rights for this editor
- the editor will no longer be assignable on new articles
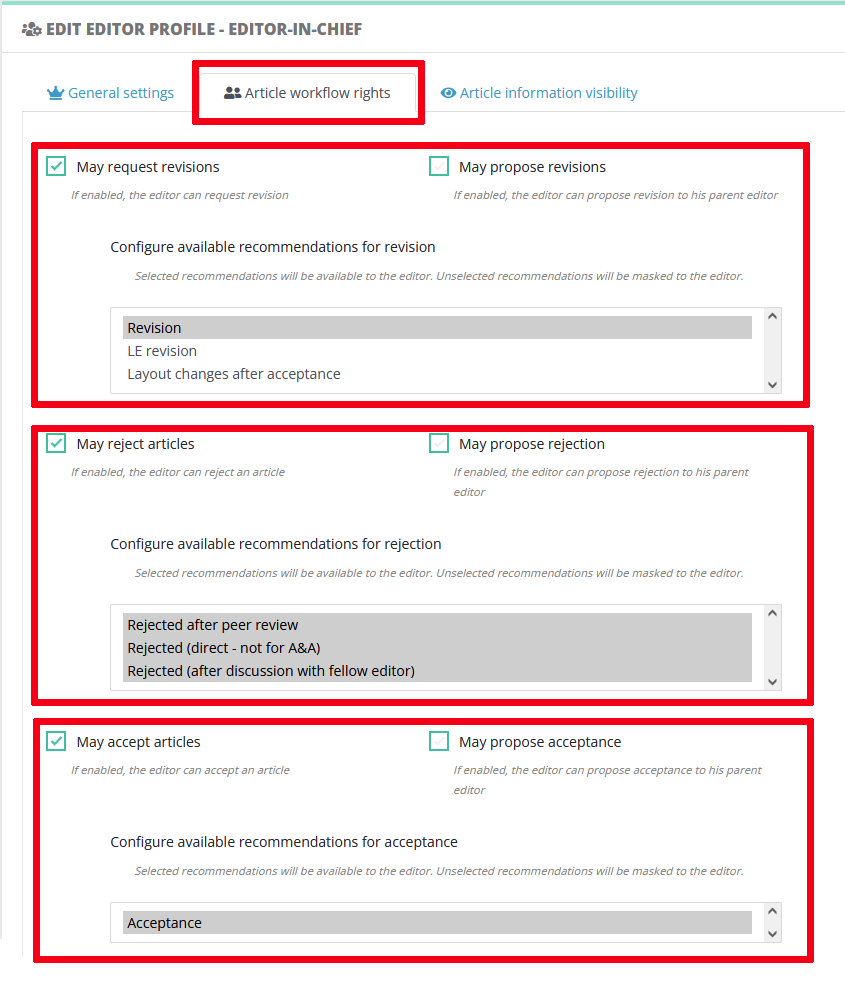
Editor profile: decisions and proposals
Depending on his/her profile, an editor can either propose or take a decision on a version (cf. the related editor guide).
This is defined in the article workflow rights:
|
|
Decisions and proposals: purposes
Your journal may or may not allow associate editors to send decisions directly. It sometimes happen that the decision to author is subject to approval by the Editor-in-Chief.
Example 1 Some journals have a straightforward acceptance workflow:
Example 2 Other journals apply a more stringent procedure, where:
|
Technical differences
|
Decisions |
Proposals |
| Trigger an editable message from Editor to Author | Trigger an editable message from Editor to his parent (assigning) editor |
|
Is recorded in the decision module |
Is recorded in the decision module |
| Article changes status according to the decision |
Article change status to "Decision proposed" |
| The current editor does not change |
The parent (assigning) editor becomes current (see also responsabililty swiches) |
Link with the recommendation system
When configuring editor rights, please take care of selecting the available recommendations for this profile. See also the dedicated page for setting up recommendations.
Editor profile: responsibility (in charge)
Writing in progress... ↁ_ↁ
Any enquiries? please contact us: support@nestor-edp.org
Configuration of e-mail templates and reminders
Overview of the template configuration
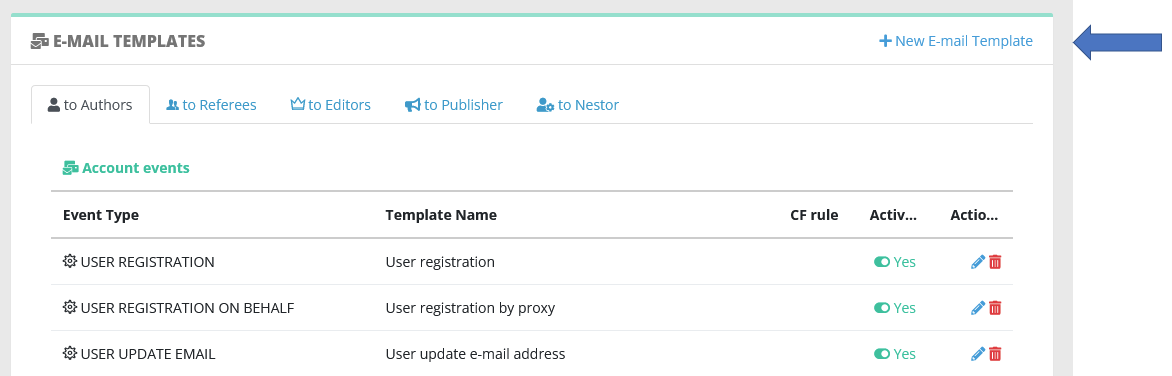
All templates linked to your journal are stored in the templates configuration:
|
|
Existing templates are sorted:
-
First, by recipient. Each family of recipient gets a thumbnail, where all templates are stored for this family:
 |
-
Second, by chronological order in the worflow process:
-
starting with account creation
-
following with peer review and decision events
-
up until production
-
|
|
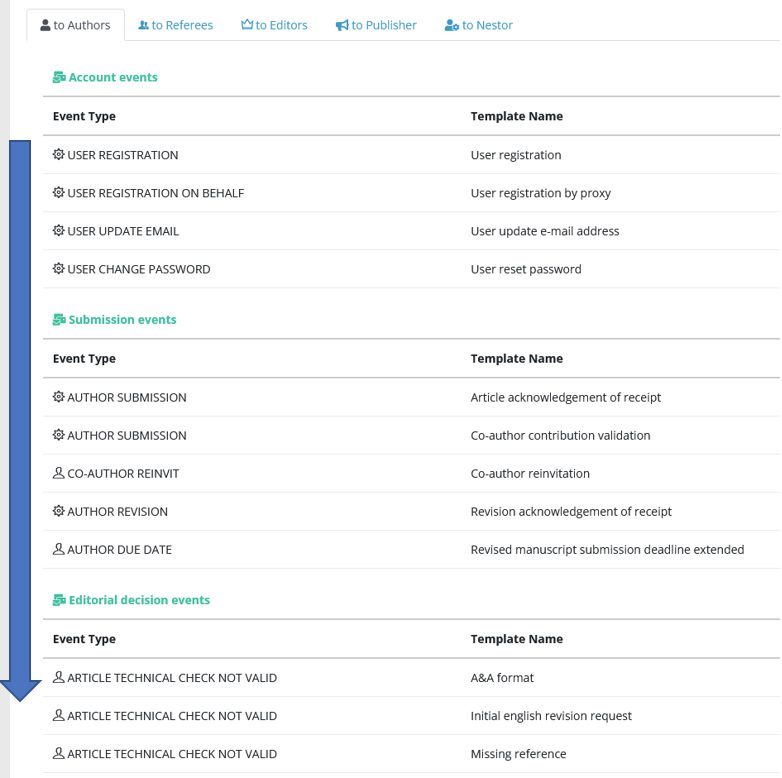
- Note that editable and automatic e-mails are distinguished by the following icons:
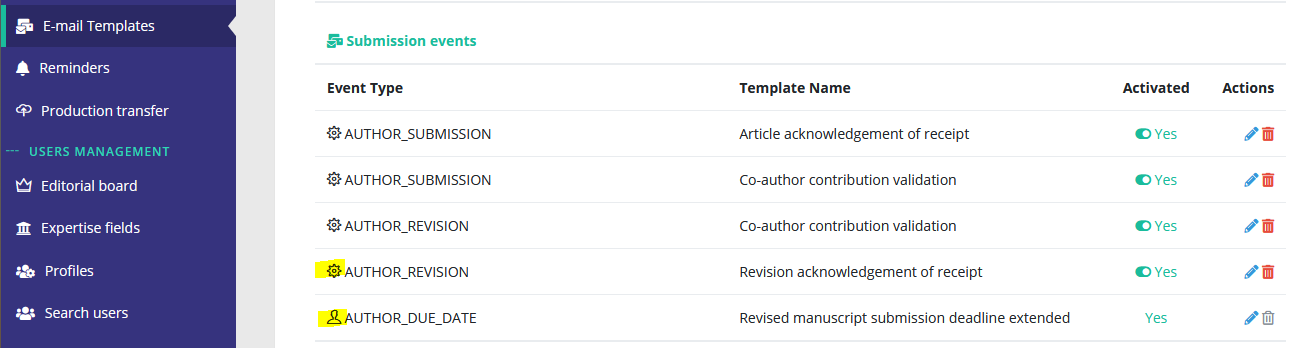 |
Editable / automated e-mails
E-mails are the primary mean of communication through Nestor:
Consequently, understanding and properly configuring the mail engine will ensure your users are timely informed of their ongoing workload.
Actions & types of e-mails
When people work in Nestor, the system will detect important events and generate e-mails according to your configuration.
E-mails can be of two types:
- Editable e-mails
- Automated e-mails
Some events only generate editable e-mails, while others only generate automated e-mails. A few events can generate both types. In those rare cases, Nestor will guide you during the template creation:

Editable e-mails
Editable e-mails are triggered when a user wants to specifically get in touch with another user. Most common cases are:
-
the Editor-in-Chief assigns an associate editor
-
the associate editor invites a referee
-
the associate editor requests a revision to the authors
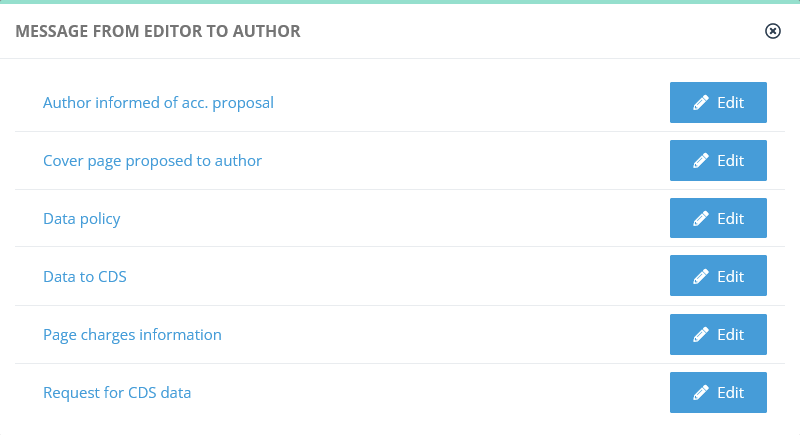
Several templates can be linked to the same event. In this case, the user will have to select which template is the most relevant for the situation:
|
|
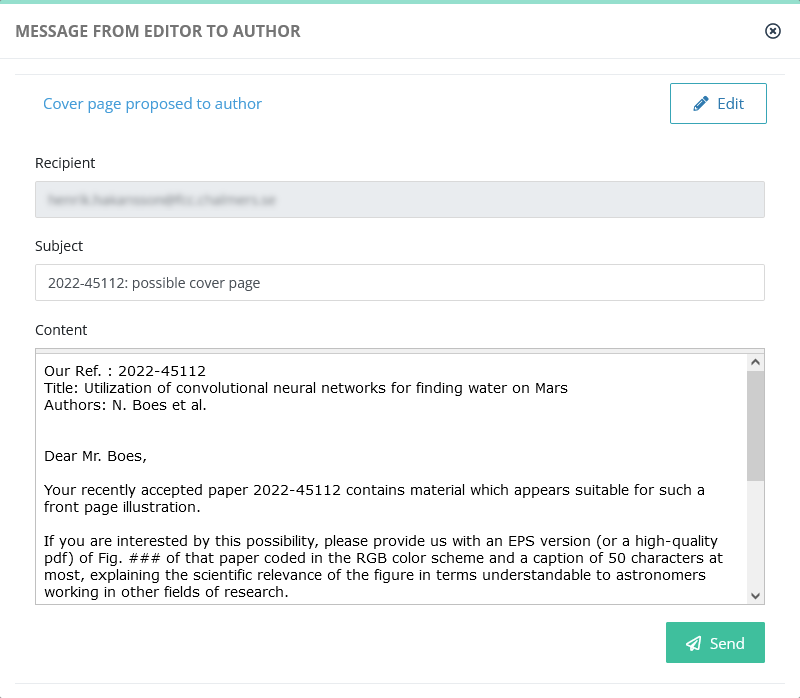
After selecting the relevant template, the user has access to an editing box, where the template can be corrected before sending the mail:
|
|
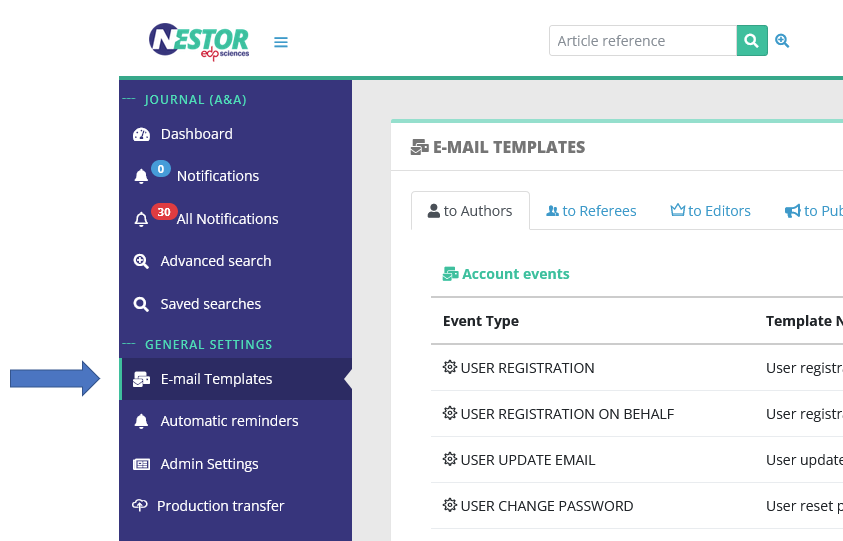
Automated e-mails
Some specific events will trigger automatic e-mails. Most common cases are:
The following events are used by the system for account management. Please take caution when editing templates linked to these:
| Name of the event |
Description |
| USER_REGISTRATION | E-mail sent when an author creates his account |
| USER_REGISTRATION_ON_BEHALF | E-mail sent when the editorial office creates an account for someone else |
| USER_UPDATE_EMAIL | E-mail sent when a user updates his mail address (= login) |
| USER_CHANGE_PASSWORD | E-mail sent to a user requesting a password reset |
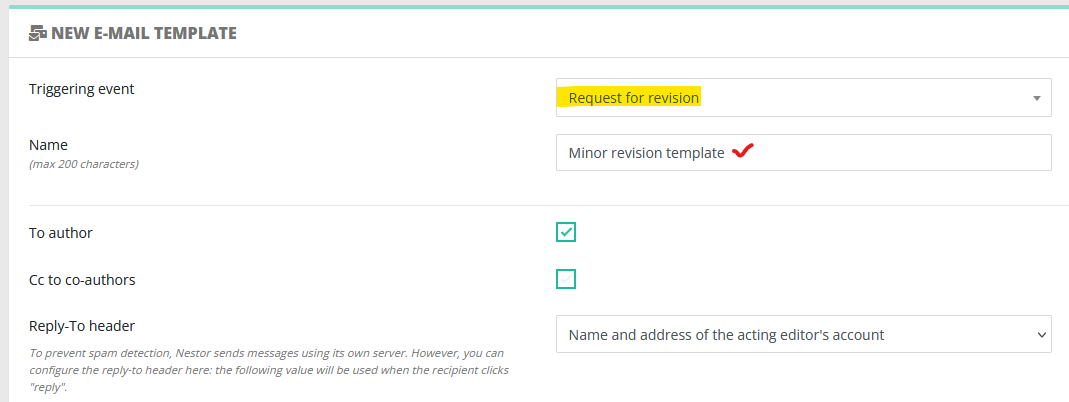
Creating a new e-mail template
Creating an e-mail template is straightforward, just click here:
You will be prompted with the template creation form, where you first must select an event. It is very important to select the correct event, as the system will use your template only when this event is detected:
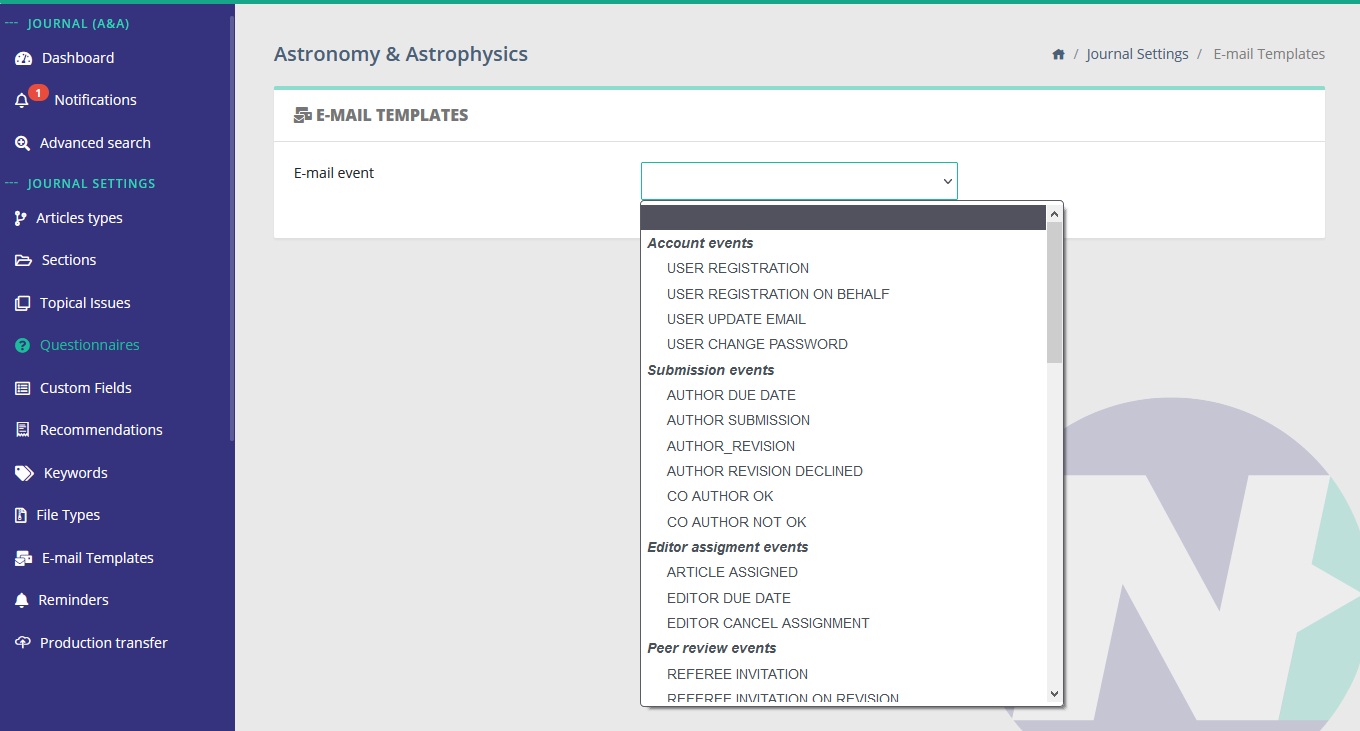
After selecting the event, Nestor will prefill the form with possible configurations to help you set up the template.
Drafting templates with variables!
Writing in progress... ↁ_ↁ
Any enquiries? please contact us: support@nestor-edp.org
Modifying date formats
{{ "now"|date("m/d/Y") }}
Test variables
{% if article.articleType.code == 'LETTER' %}letter{% else %}paper{% endif %}
{% if articleEntity.finalDecision == 'CLOSED' %}
{% elseif articleEntity.finalDecision == 'WITHDRAWN' %}
Coauthor variables
{% if recipient.isPending %}
{% if recipient.hasValidated %}
{% if recipient.validOrcid %}
Drafting templates with conditions!
Nestor uses a programming language to generate text in messages. You can harness this and use branching conditions in your templates: https://twig.symfony.com/doc/2.x/tags/index.html. The configuration is a bit technical, but will result in:
- modulable texts
- cleaner interfaces
- less technical support
The description below gives one typical example, but the possibilities are endless.
E-mail conditions: a case study
Let us consider the case of the acceptance letter, where we want to:
- use some general text to inform the author that the article is accepted
- IF certain conditions are met, modify a few parts of the text
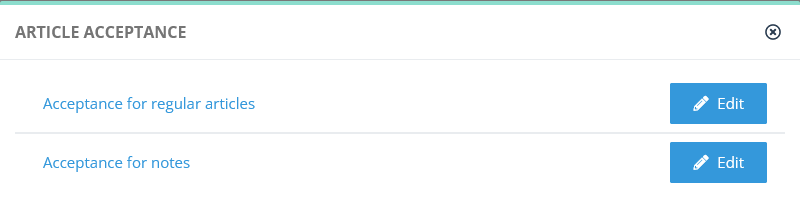
For this purpose, we could create two different templates:
| Template for a "regular article" |
Template for a "note to the editor" |
|
Dear author, Congratulations on being accepted! We have received all source files and your paper is now in the hands of the copy editor. You will receive the galley proofs in about two weeks. Best regards, The Editorial Office |
Dear author, Congratulations on being accepted! We have received all source files and your note to the editor is about to be published! You will receive the galley proofs by tomorrow. Best regards, The Editorial Office |
This presents the following downsides:
- now we have two similar templates to maintain
- this clutters the editor interface:
|
|
Instead, let us create one single template, inserting cool conditions when needed:
| Global template |
|
Dear author, Congratulations on being accepted! We have received all source files and your {% if article.articleType.code == 'REGULAR' %}paper is now in the hands of the copy editor{% else %}note to the editor is about to be published!{% endif %}. You will receive the galley proofs in about {% if article.articleType.code == 'REGULAR' %}two weeks{% else %}by tomorrow{% endif %}. Best regards, |
This results in a single template to maintain, and a cleaner editor interface:

Attaching rules to templates
In Nestor, critical actions will trigger a message and update the article status / dates when necessary. There are also cases when sending an e-mail should trigger an update of the article data, such as the section, or typically, a custom field.
E-mail rules: a case study
Let us consider this case, where a journal has a special procedure to highlight good papers on the journal website. For this purpose, the editorial office keeps track of the procedure, by using an article custom field:
|
|
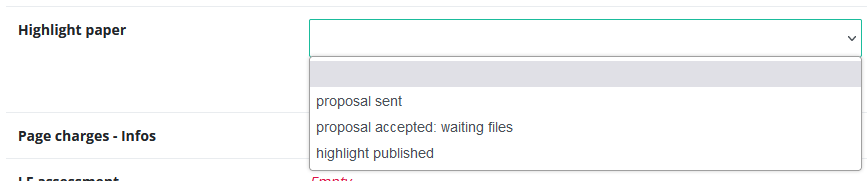
We want the above field to be set automatically to "proposal sent" when sending this message :
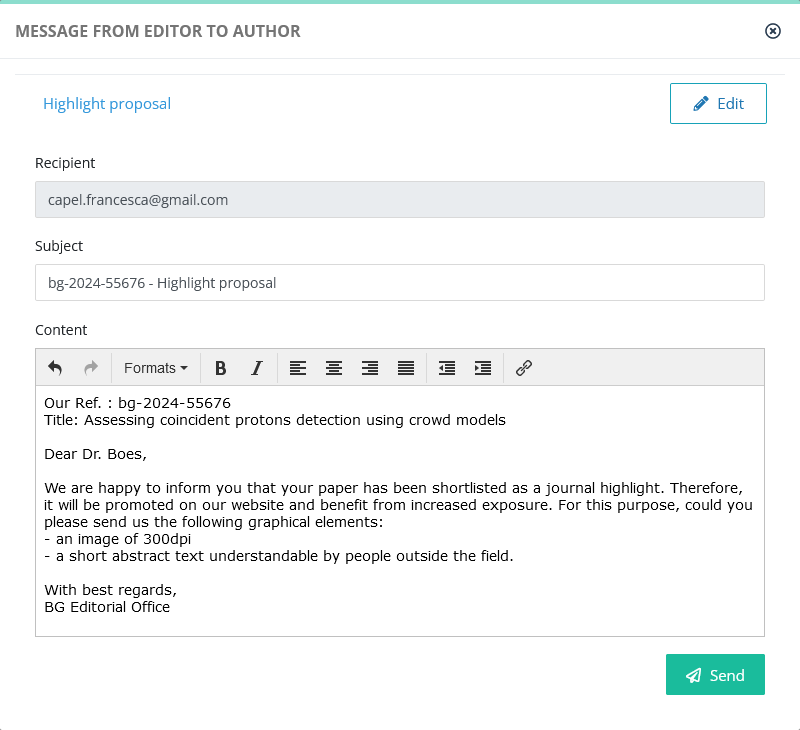 |
Resulting automatically in:
 |
To do so, the Editorial Office can configure an update rule in the template configuration:
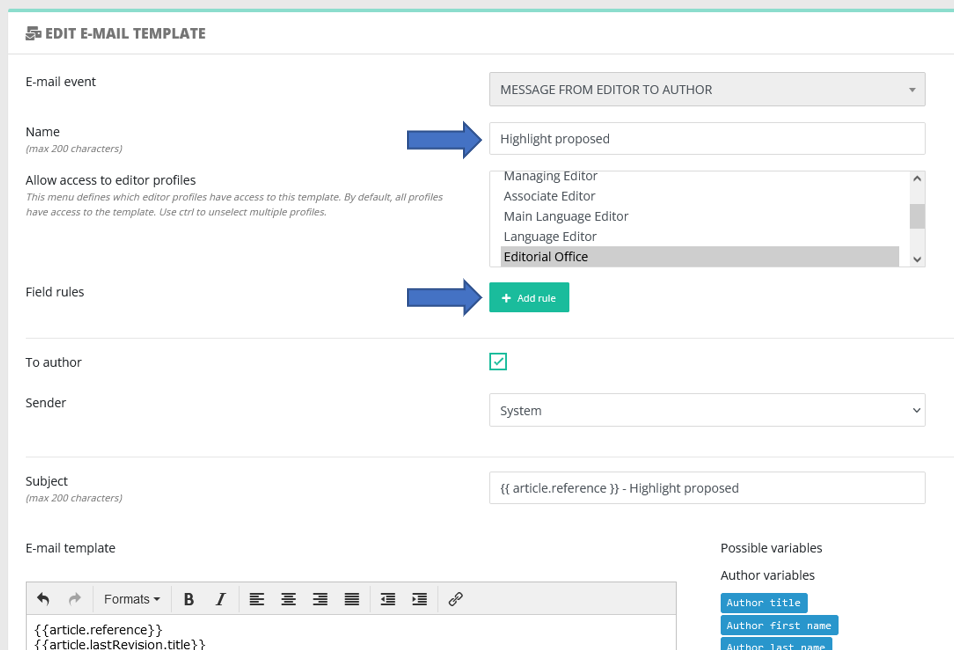 |
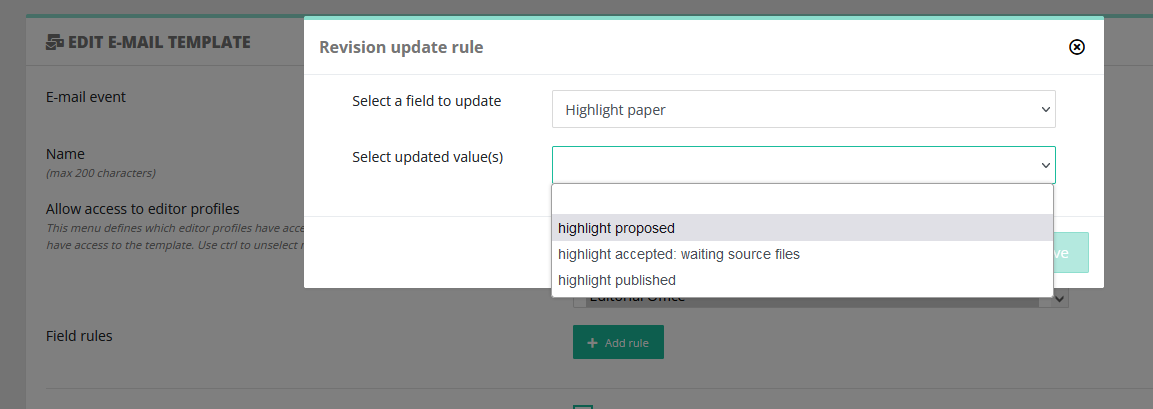 |
After saving the configuration, each time this e-mail is sent, the "Highlight paper" value of the article will be set to "highlight proposed".
Notification bells

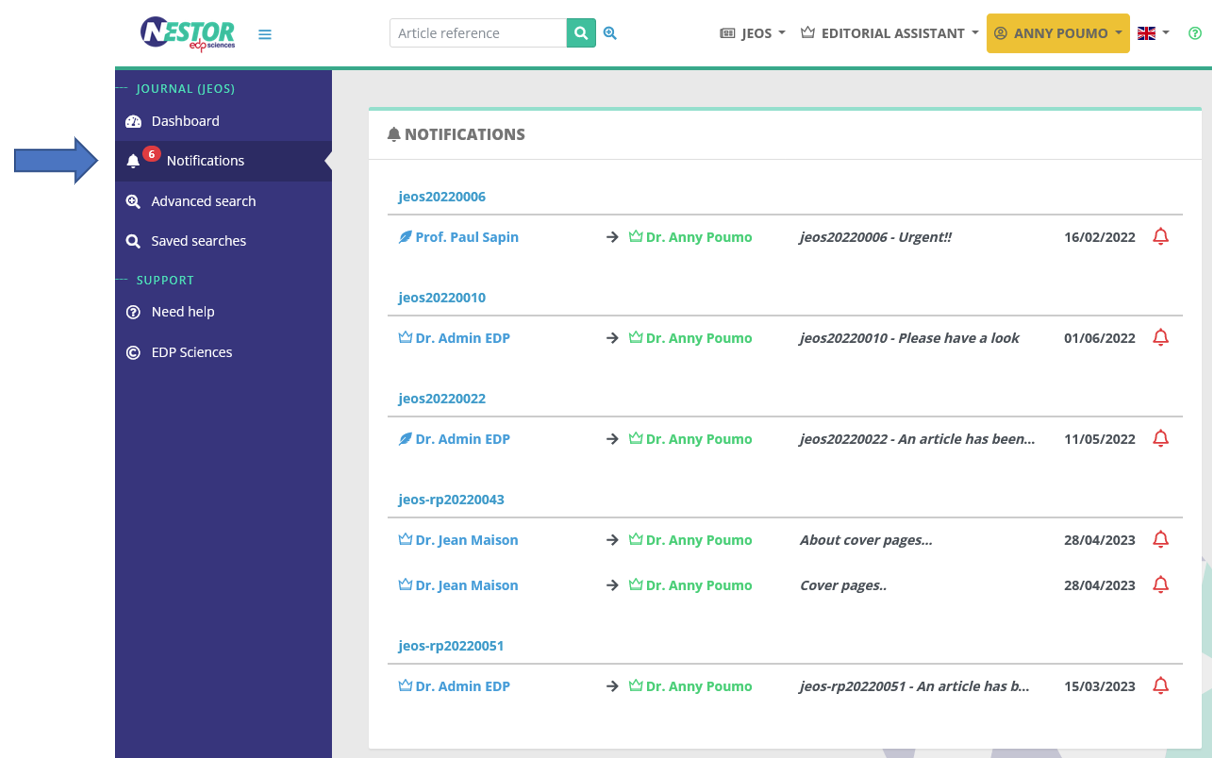
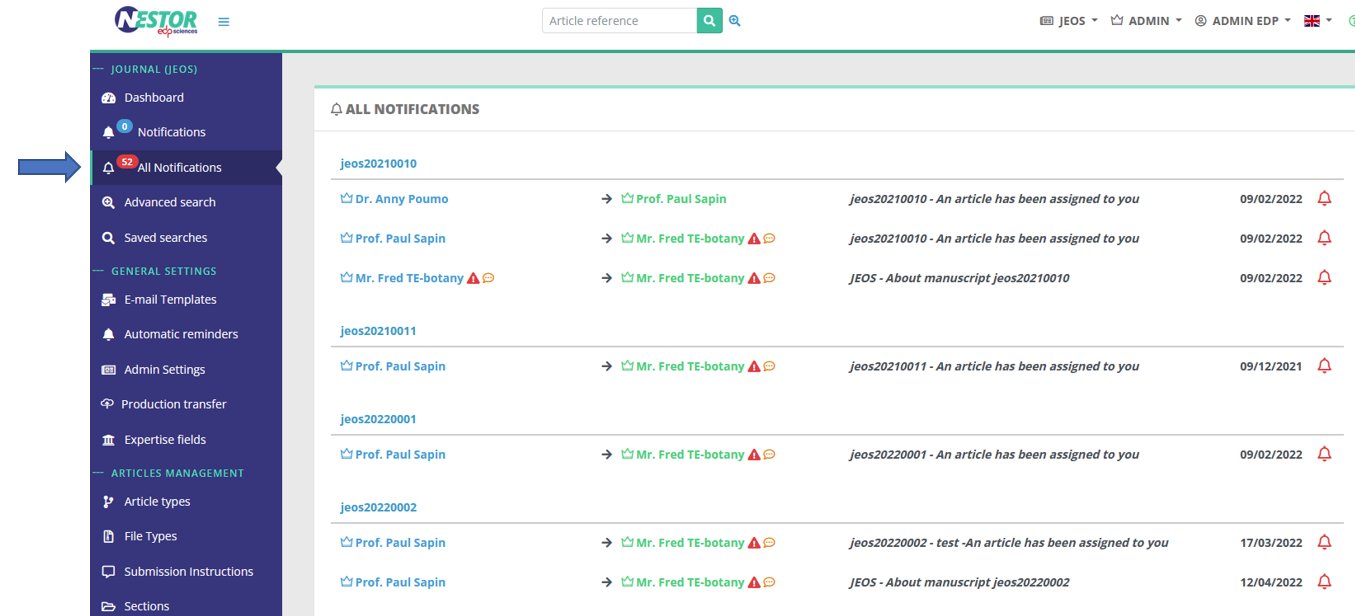
Important e-mails are sometimes lost in the crowd and overlooked by editors. This is especially true for e-mails outside of the workflow, dealing with particular cases etc. Notifications are here to prevent this! Nestor tracks e-mails tagged as "important" and highlights them in the recipient interface.
- In the home page, editors will retrieve important e-mails they have received via the notifications menu:
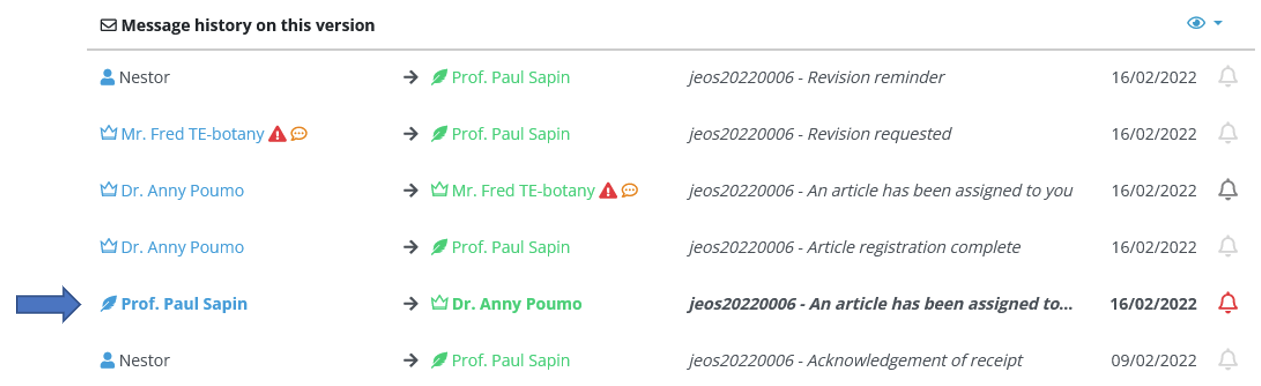
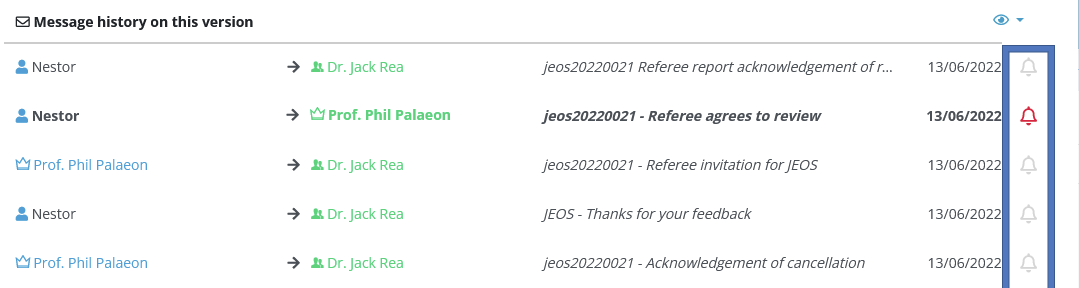
- In each article, they will retrieve them in the message history:
Setting up notification bells
Automatic notification bells
Nestor can tag an e-mail as "important" as soon as the mail is sent. To do so, the template must be configured accordingly:
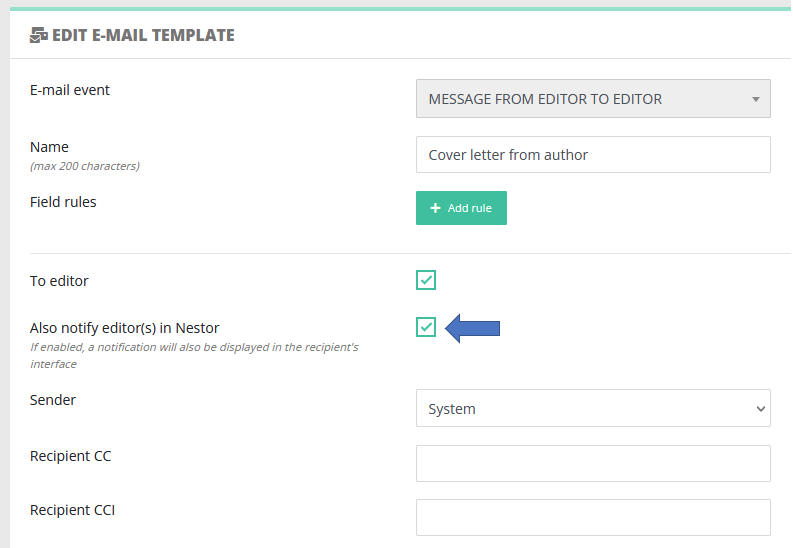 |
In this example:
- when the editorial office sends this message to an editor
- then, this message will be tagged with a bell in the recipient editor interface (in the message history).
Manual notifications
Regardless of the template configuration, notification bells can be set up manually on specific e-mails, when needed.
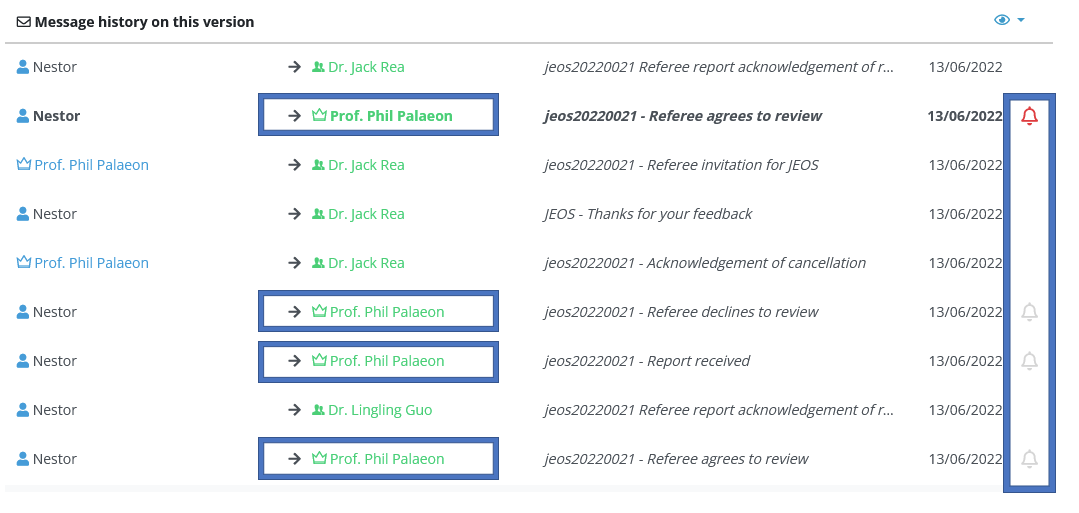
Note that an editor can see and uncheck important mails if he/she is the recipient. He cannot vizualize/uncheck notification bells on other e-mails (to other users). For example below, connected as Phil Palaeon, checking the message history of article jeos20220021. We observe notification bells appear only if I am the recipient:
Profile right: access to all notifications
The right below allows the editorial office to have complete control over every user notifications in the journal:
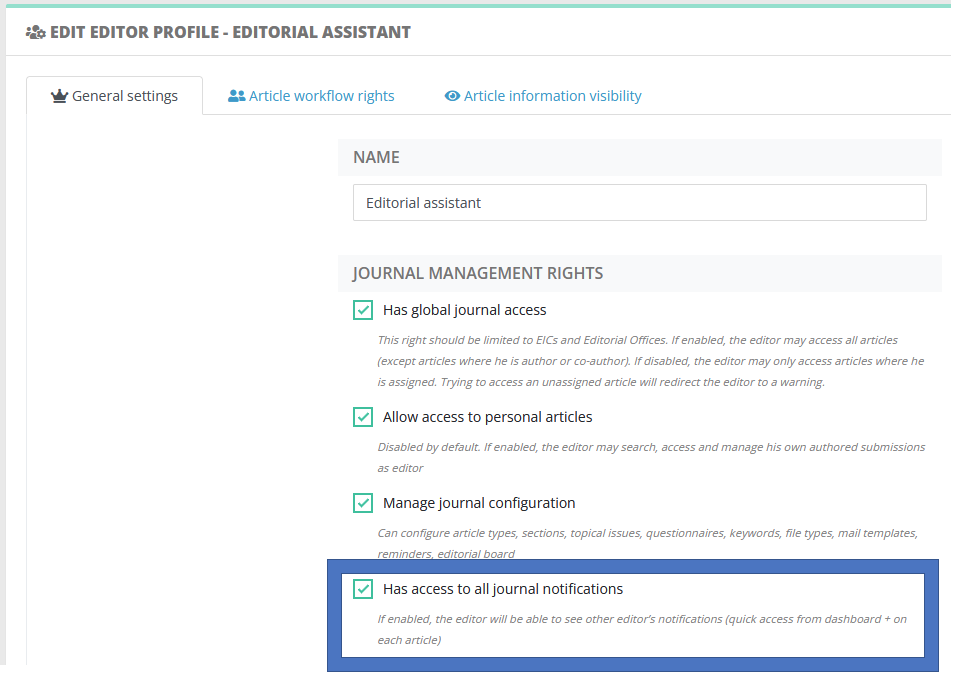
- First, this right unlocks a special view on all active notifications in the journal (regardless of the recipient)
- Second in the message history, the Editorial Office can check/uncheck any mail deemed important (even when the EO is not recipient):
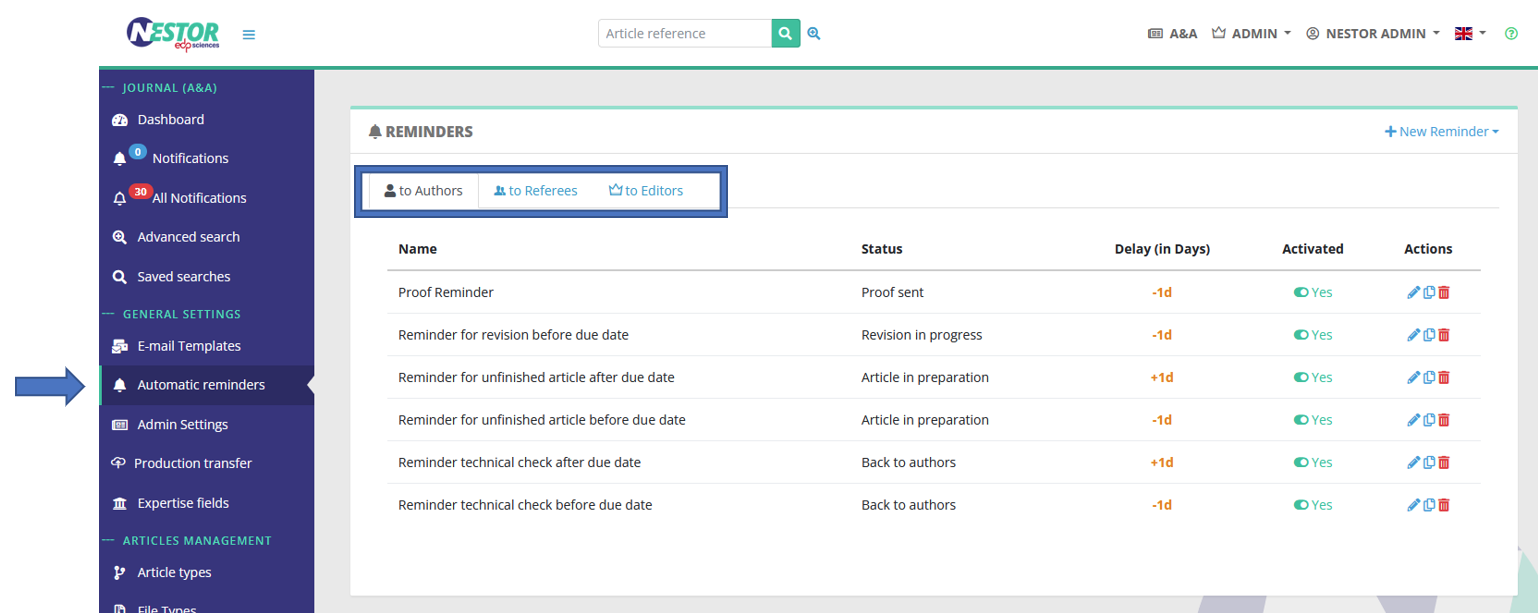
Configuration of automatic reminders
Automatic reminders are configured here, they are sorted by family of recipients:
Author and referee reminders
- for each article, Nestor evaluates if an action is expected from the author or referees
- if so --> Nestor checks the author/referee due date
- it compares today's date with with the delay configured in the reminder
- if the delay is met, Nestor triggers an automatic e-mail
|
Example 1 - Reminder for a revision
|
|
Example 2 - Reminder for a referee report
|
Editor reminders
Editor reminders work differently: editors usually work on several manuscripts at the same time, so it is not possible to send them one e-mail for each manuscript. Instead, Nestor will regularly send a summary of the editor to-do list, in this format:
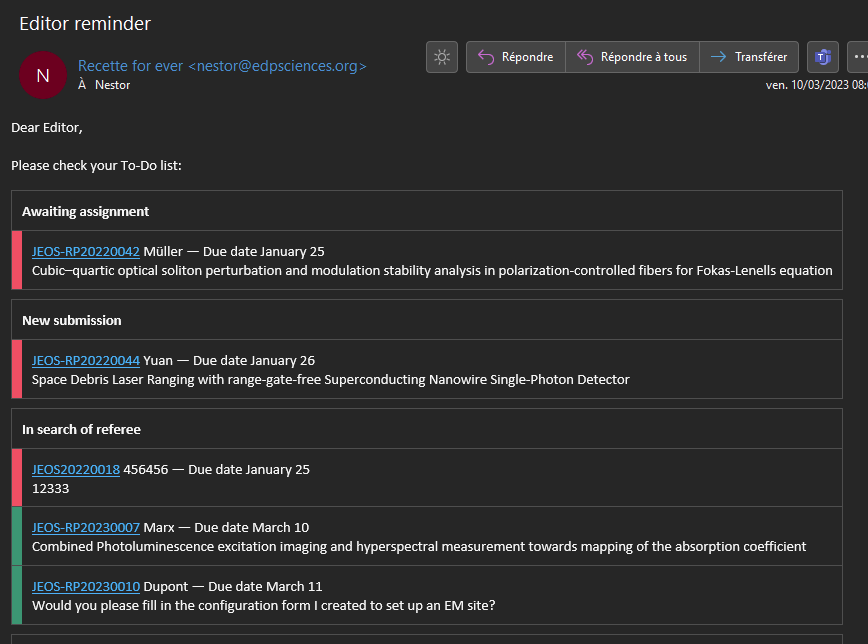
Note that editor reminders are configured by profile: this way you can remind different profiles using different frequencies. Typically EIC do not need to be reminded as often as Associate Editors. In the screenshot below, we can observe that:
- This reminder will send an e-mail only to Editors-in-Chief
- On May 18
- And then, every 7 days (May 25, June 1 etc.)
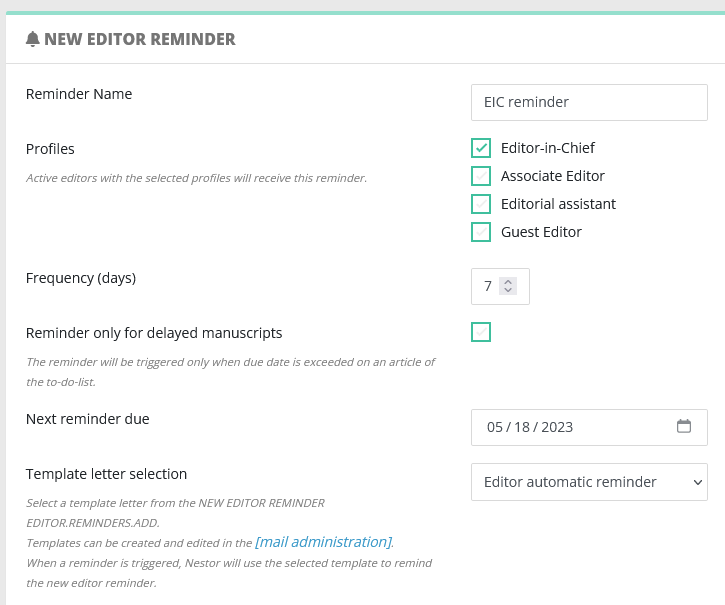
NB the template letter selection will propose all templates linked to the event EDITOR AUTOMATIC REMINDER. Make sure these templates include the variable {{ editorReminderList }}
If an editor complains about receiving too many automatic reminders, note that he/she can disable the reminders in his own account (check "configure e-mail alerts" in the editor guide).
Creating a request for revision (to the author)
A request of revision must be created with the event: "Request for revision":
Once the template is created, it must also be linked to a specific recommendation:
Statistics
Day-to-day statistics
To prepare statistics on articles, you can use advanced searches and data exports to get the source data. From then on, you can handle common statistics requests using pivot tables in your favorite spreadsheet program.
Delay computations
Concerning delay computation between two dates, use the following formulas in Excel (to use column headers, format your data as a table).
| 1 | Submission date |
Final decision date |
From submission to final decision (formula) |
| 2 | 25/05/2023 | 27/06/2023 | 24 |
| 3 | 25/05/2023 |
Standard formula
=IF(OR(A2="",B2=""),"",DAYS(A2,B2))French Excel version
=SI(OU(A2="";B2="");"";JOURS(A2;B2))Recommended: column headers, needs data to be formatted as a table
See example below:
- Any missing date will output a null result (= no delay computed)
- A negative result highlights a workflow issue, and is thus output as N/A
Formula
=IF(
OR([@[Publication date]]="", [@[Submission date]]=""),
"",
IF(
[@[Publication date]] - [@[Submission date]] >= 0,
[@[Publication date]] - [@[Submission date]],
"N/A"
)
)French Excel version
=SI(
OU([@[Publication date]]=""; [@[Submission date]]="");
"";
SI(
[@[Publication date]] - [@[Submission date]] >= 0;
[@[Publication date]] - [@[Submission date]];
"N/A"
)
)| Submission date | Publication date |
Submission to publication, with the above formula |
| 04/11/2025 | 02/01/2026 | 59 |
| 07/11/2025 | 03/01/2026 | 57 |
| 15/11/2025 | ||
| 17/11/2025 | 15/11/2025 | N/A |
FAQ
The editor tells me he cannot perform an action. How can I see his interface and help troubleshoot it?
Administrators are allowed to log in as another user and perform actions on his/her behalf.
This allows the administrator to see exactly what the users experience, and helps to quickly troubleshoot problems. Note that users' passwords are crypted and remain undisclosed to the administrator.
The feature is available to the administrator via each user page. When clicking on a Nestor user, the administrator has access to this button:
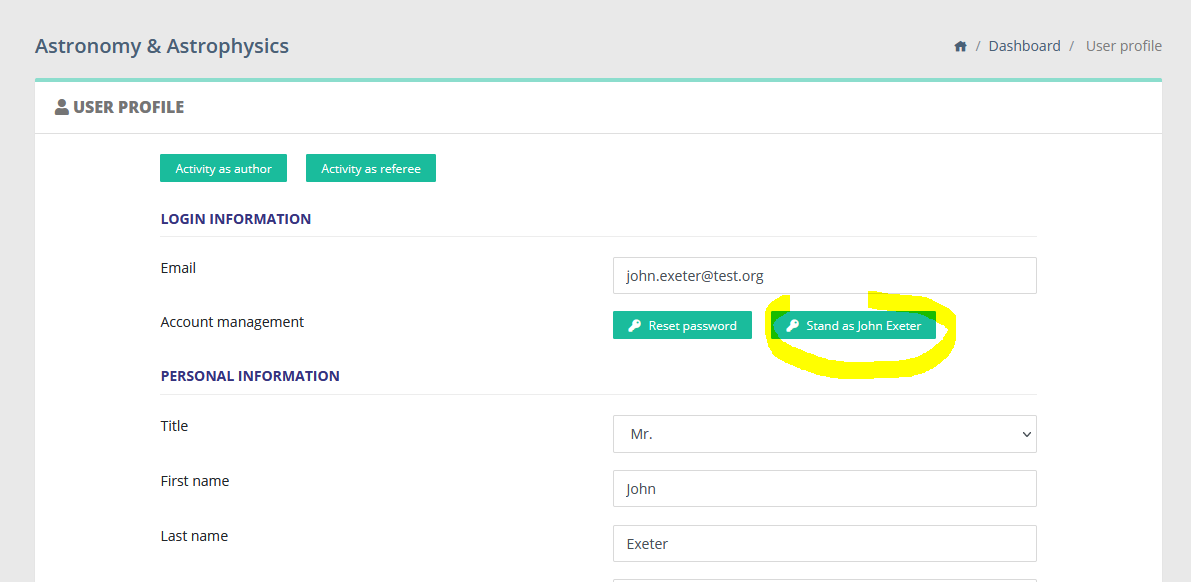
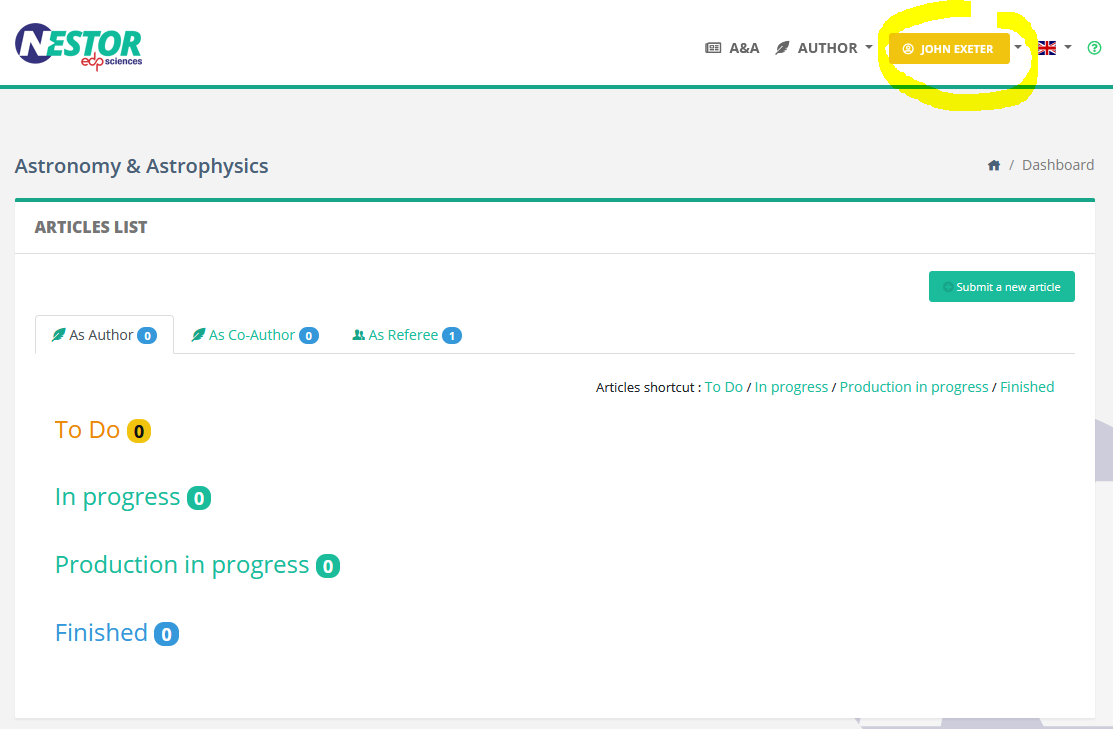
From that point on, the administrator can execute actions on behalf of this user.
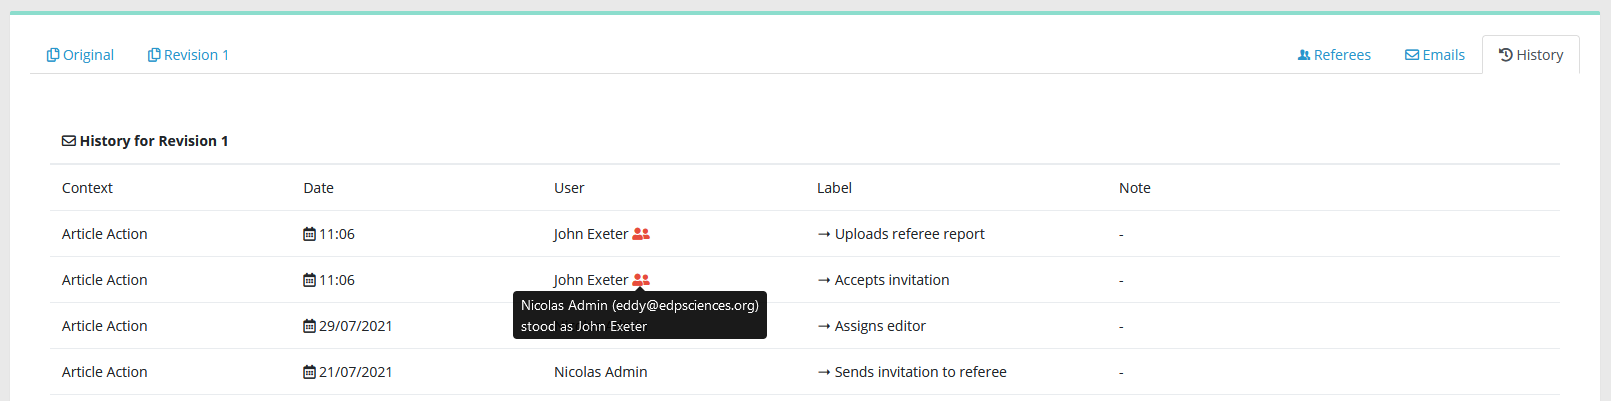
Any action recorded in the article history will appear as executed by the impersonated user, with a special note:
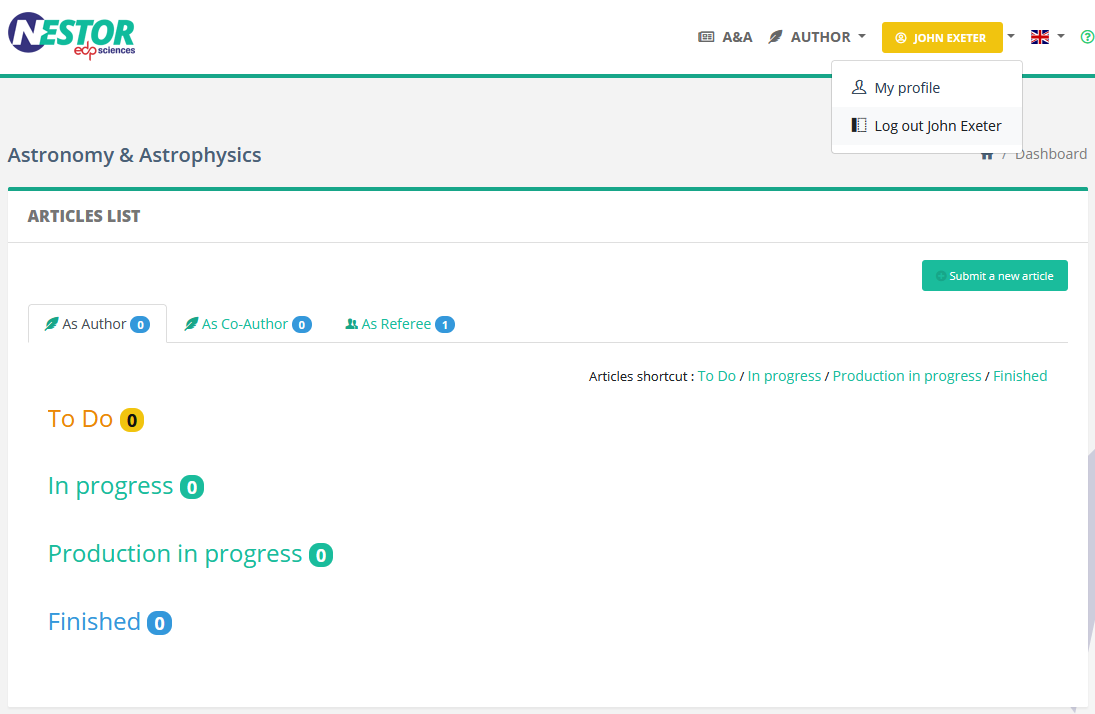
To leave the user account, the administrator simply has to log out as usual. He will be redirected to his own account:
How to send files to Similarity Check?
Nestor can send files to Similarity Check (SC). SC can be triggered either manually or automatically.
Automatic Similarity Check
Automatic SC is defined at the file type level. The conditions are the following:
- the auto SC box type must be checked in the file type
- this is the first version of the article
- the file is either DOC or PDF
- the file must not exceed 20 MB
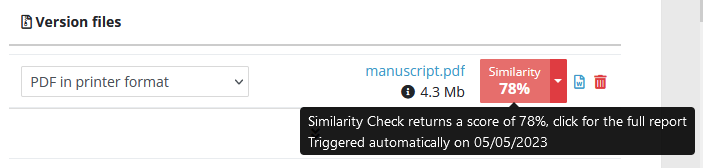
If all these conditions are met, the file is automatically sent to SC when the author completes the submission. This will return a similarity percentage that you can retrieve in the file module:
Manual Similarity Check
On an article, in the file management module, the SC button will appear if the following conditions are met:
- your profile must have the right to use SC
- the file is either DOC or PDF
- the file must not exceed 20 MB
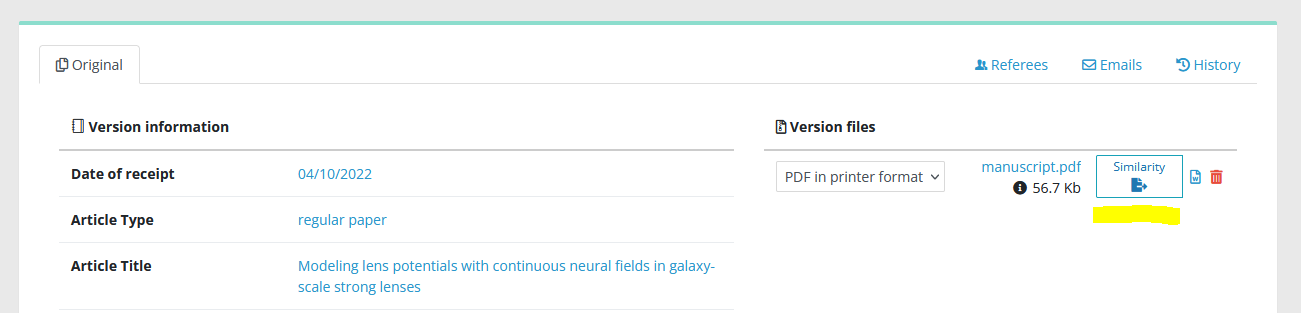
Push the button, and let simmer a few minutes…

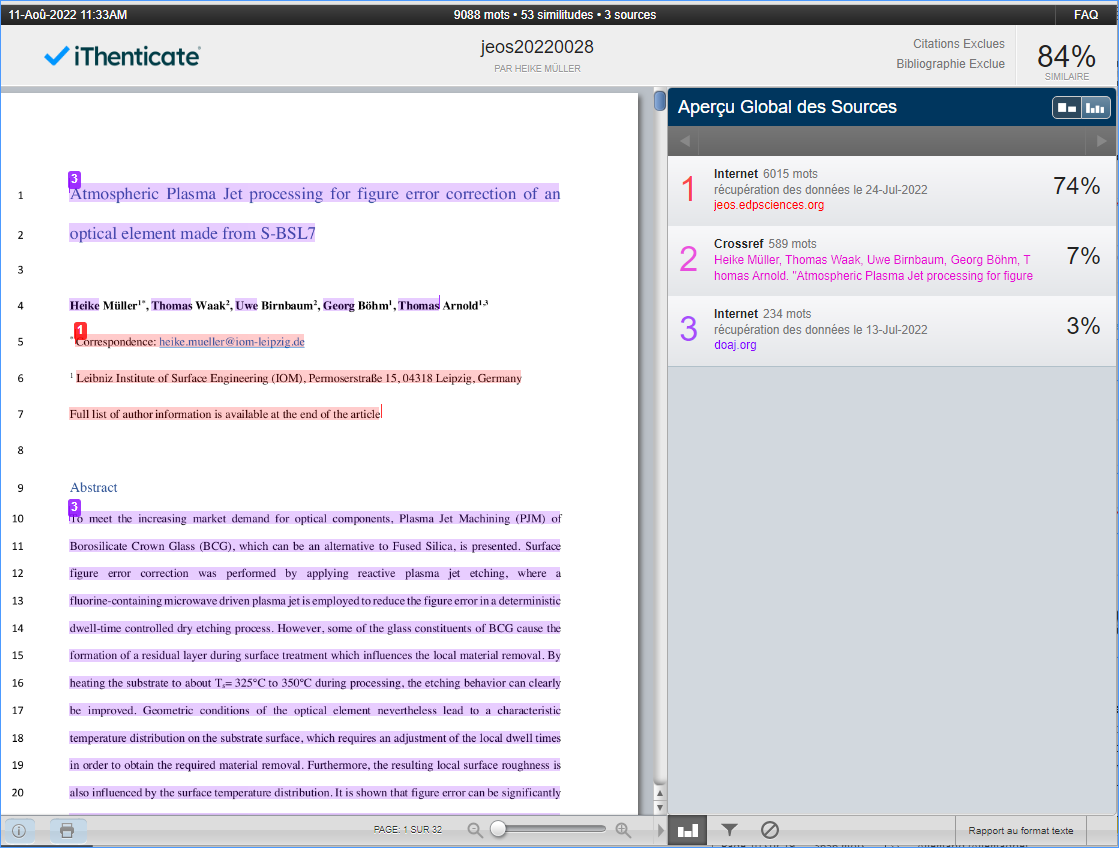
Nestor will then display the similarity result, clicking the percentage will lead you to the full report in iThenticate.
How can I set up automatic reminders?
Have a look at this page ʕ•ᴥ•ʔ