Editor guide
As editor, you will evaluate the manuscript, suggest improvements and eventually accept or reject it. This guide presents the following: - Overview of the general interface and workflow - Overview of the article page - Overview of relevant actions on articles
- FAQ
- Presentation of the general interface
- Presentation of the article page
- Upper area: the main information
- The quick actions toolbar
- The due date
- Lower area: versions
- The metadata module
- The file management module
- The referee management module
- The editorial decision module
- The correspondence module
- History tabs
- Editor assignment and responsibility
- Assigning editors
- Current editor and to-do list
- Editor in charge and personal dashboard
- How does editorial responsibility switch?
- Peer review management
- Finding/creating a referee
- Contact a suggested referee
- Referee AI search with Prophy
- Managing invited referees
- Checking/editing referee reports
- Uploading my own report on the paper
- Editorial decisions and proposals
FAQ
I cannot send my decision on this article, why?
If the buttons are unavailable in the decision module, this means either the status of the article does not allow a decision, or your profile does not have the right to take the decision.
Most of the time, this is caused by the status, typically these two statuses will lock the editorial decision:
- Revision in progress (with author)
- Peer review in progress (with referee)
This is a feature ensuring the author or referee(s) complete their pending tasks. To unlock the decision, you must either:
- wait for them to complete the task (or do it on their behalf)
- or cancel the task (revert decision / cancel referee)
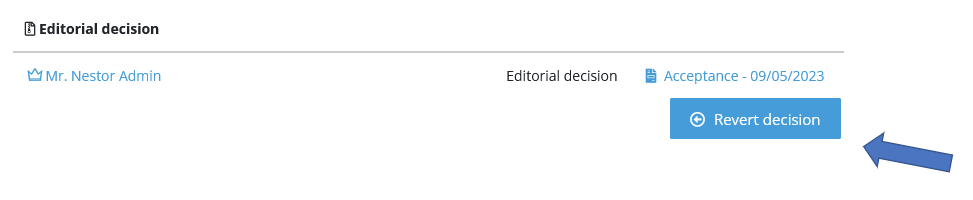
I made a mistake when sending the decision, how can I cancel and resend it?
You must first revert your previous decision! This is done via the decision module:
When sending a message, I can only enclose one file, why?
Spam filters are sensitive about enclosures. To preserve our sender address reputation, Nestor respects the following safeguards:
- Limit the number of files enclosed to an e-mail
- Limit the size of enclosed files
- Limit the hourly volume of sent e-mails
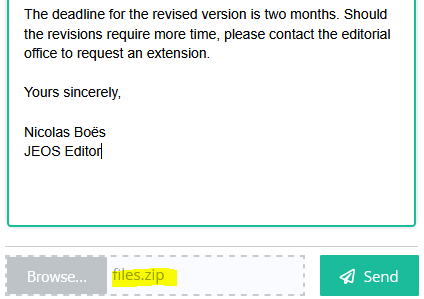
To enclose several files, three methods are at your disposal:
1. The simplest method is to zip the files and upload the zip here:
2. Another straightforward solution is to assign yourself as referee and upload the files in the report form. This will insert a link in your decision, that the author can simply click to download the files.

3. An alternate solution is to upload the files in the file management module, and refer the author to it. Check with your editorial office that file types are properly configured and ensure the author has access to it.
How can I correct my e-mail address and personal information?
Click on your name and on ‘My profile’:

From this page, you can:
- Correct your address and reset your password
- Link your ORCID account to your Nestor account
- Add or edit your institutes
- Set unavailability dates
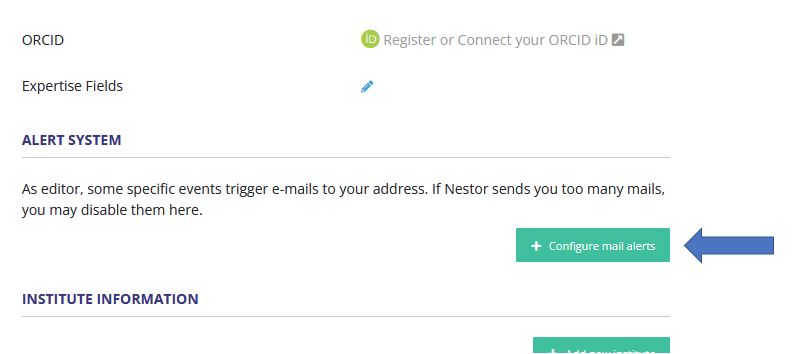
The system sends me too many e-mails, how I can I disable them?
E-mail alerts can be disabled via your personal account. Please click on your name and on ‘My profile’:
From there, go the Alert System:
 |
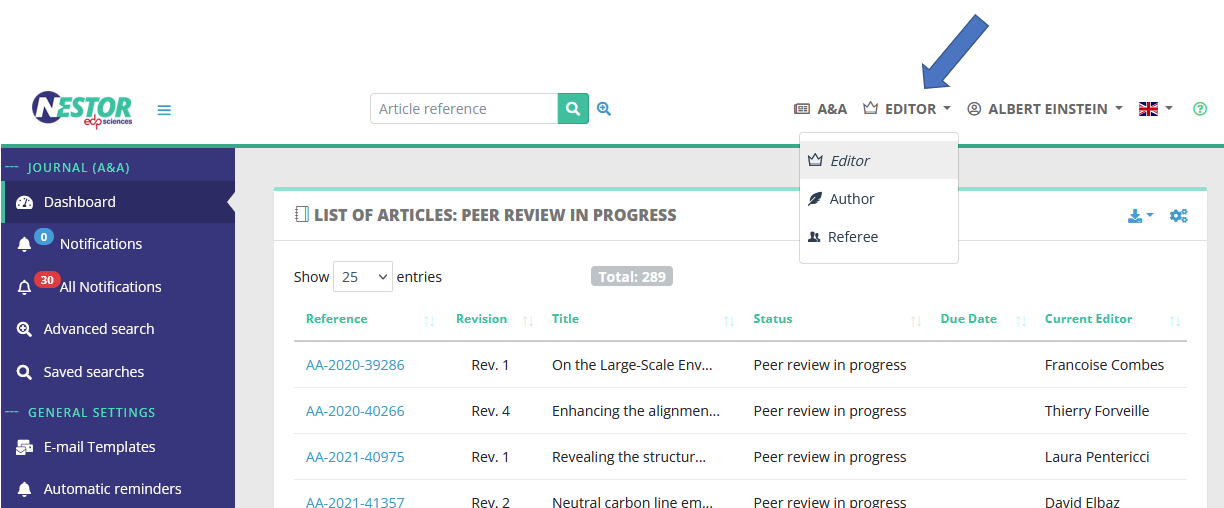
I want to submit a paper myself, how can I reach the author interface?
By default, Nestor will log you as editor. If you want to submit a paper where you are the author, you must switch your role! This is done here:
Presentation of the general interface
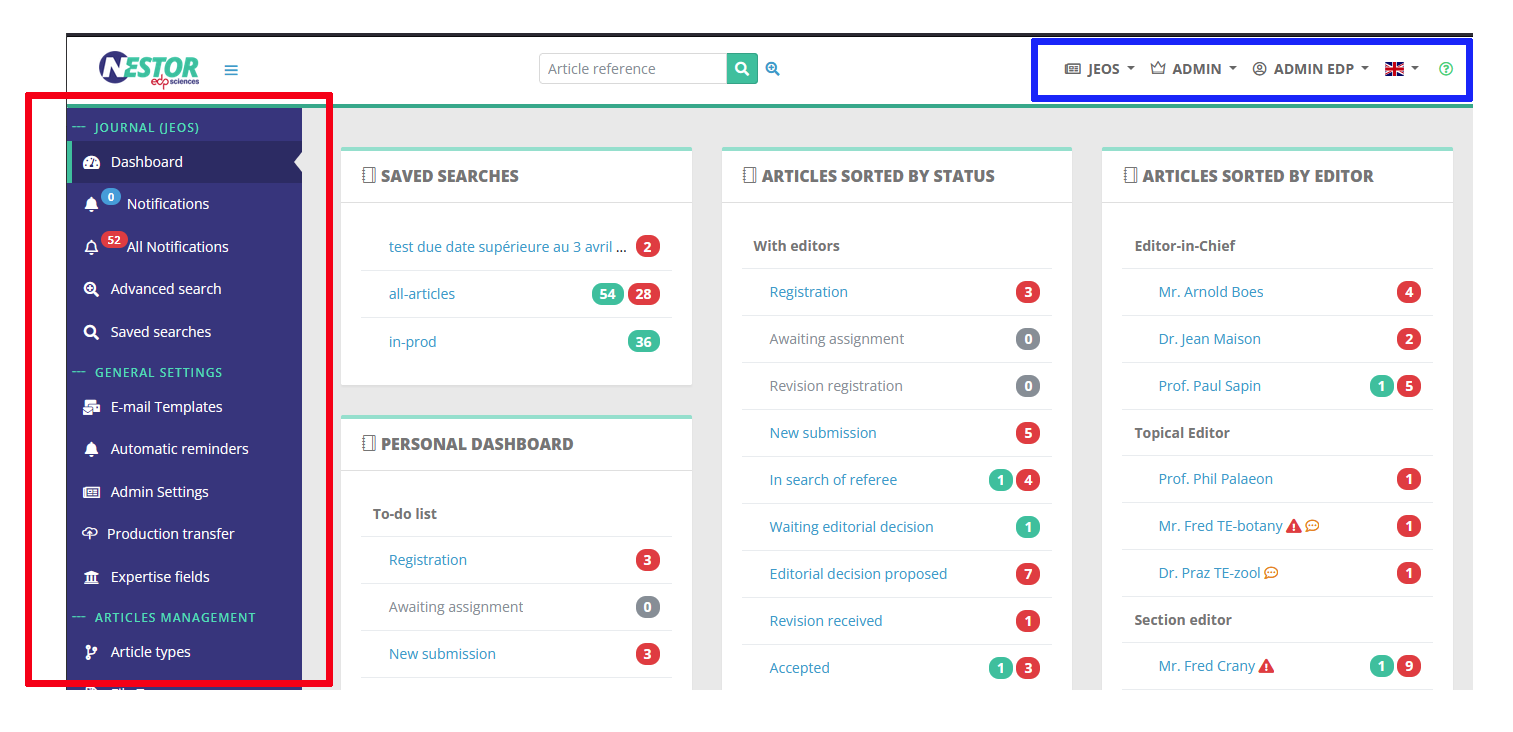
Menus
On the editorial home page, two menus are available:
- the left vertical menu, which features:
- search tools
- notification tools
- journal configuration tools (if your profile allows it)
- the upper horizontal menu, to manage your personal account
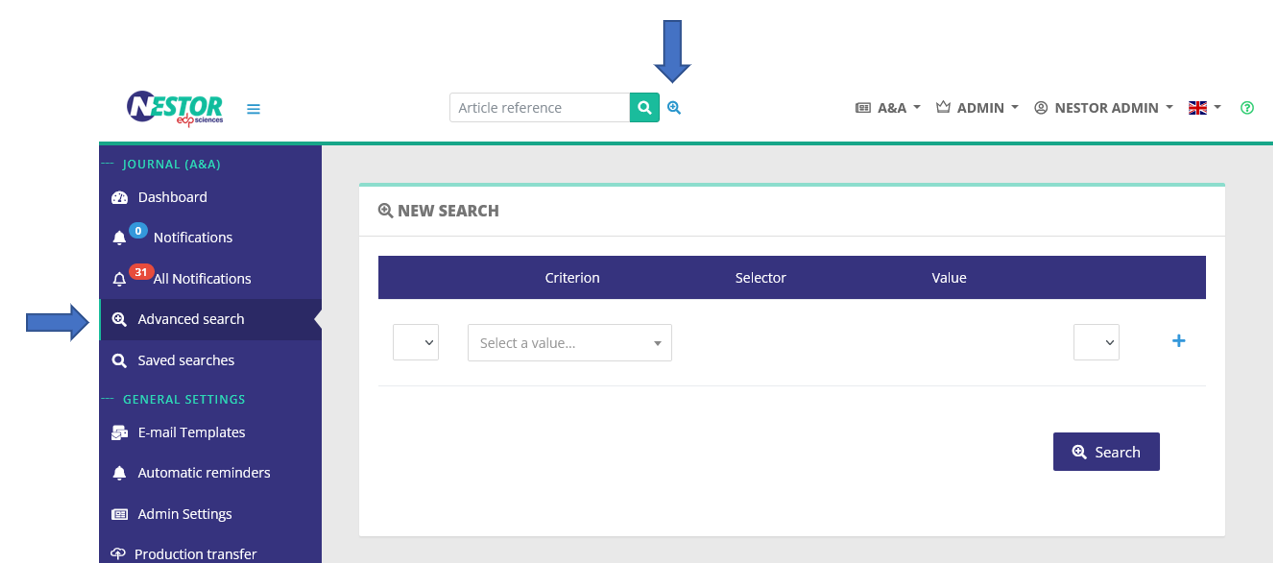
Advanced and saved searches
The advanced search is available through two buttons in your interface:
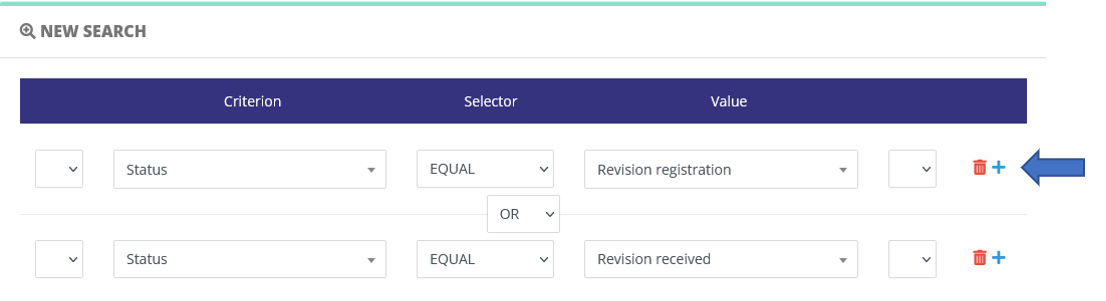
Criteria, operators and groups
The advanced search allows you to look for articles by combining several criteria with AND and OR operators.
To add a criteria, click on the (+) icon:
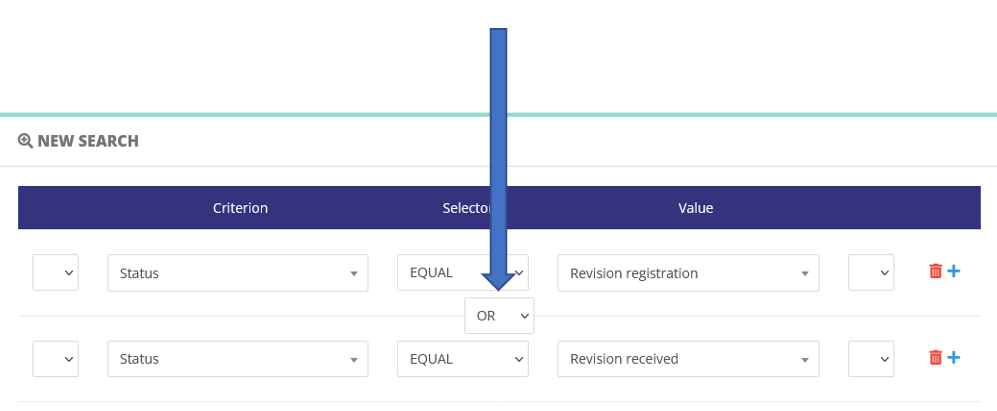
When several criteria are present, they must be combined with a boolean operator:
Criteria can be grouped to refine your search. Groups are created using parentheses:
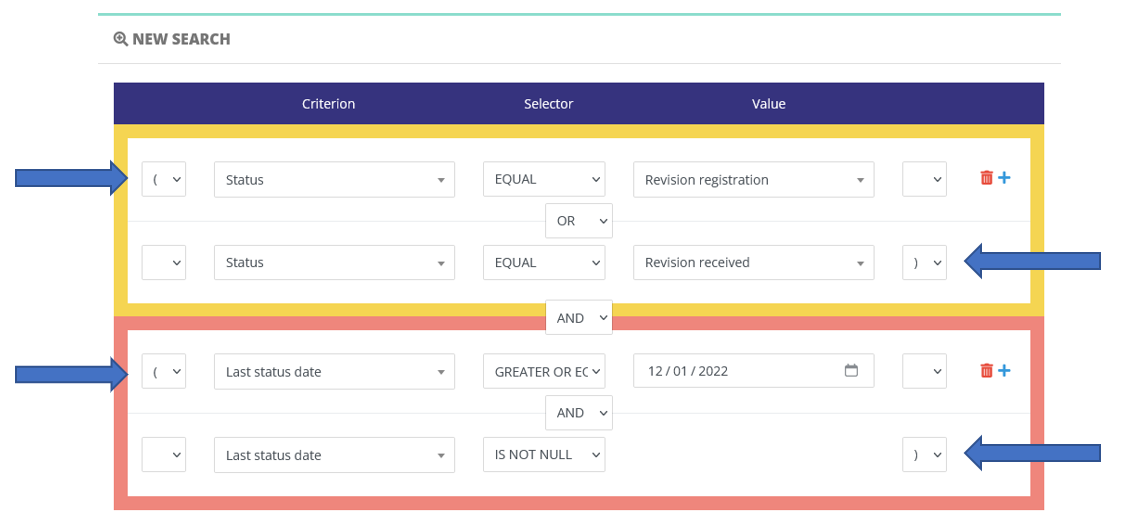
Advanced search: a case study
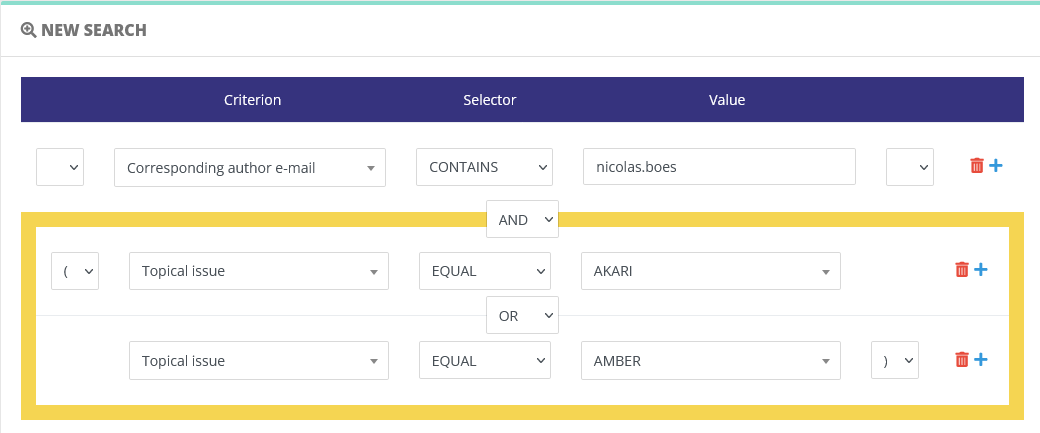
For example, let us search for papers:
- submitted by one specific author
- for two different special issues
The search request will look like this, where we specify:
Saving search criteria
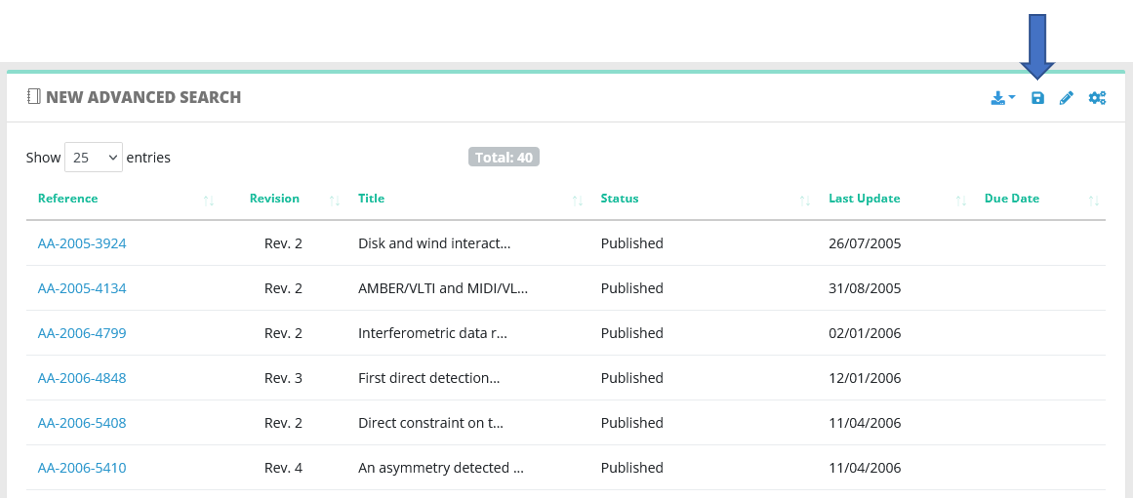
Once the search is launched and you visualize results, you can save the criteria:
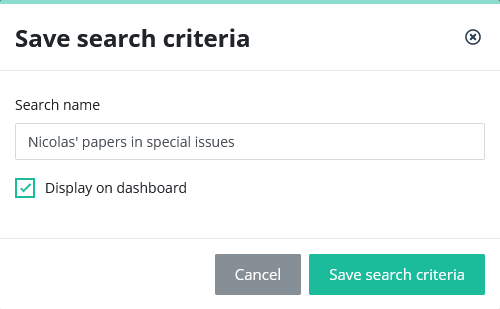
To save the search, you must input a name, and can optionnally display a shortcut in your dashboard:
You will retrieve your saved searches here:
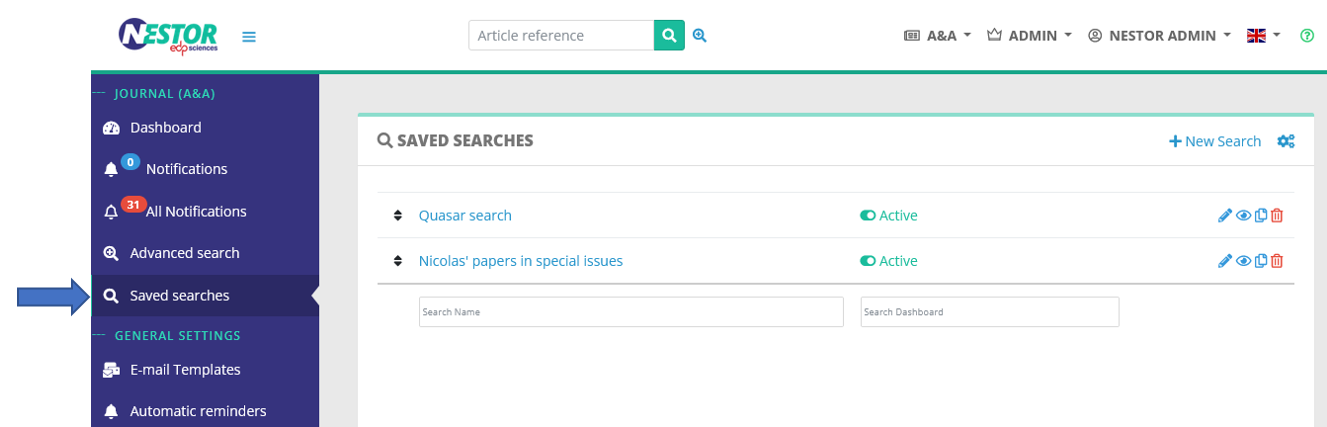
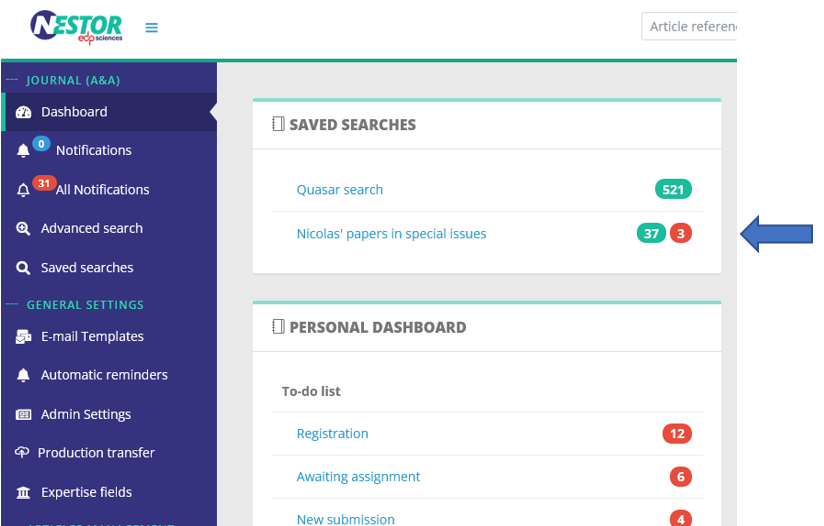
and in your dashboard if you activated the option:
Editing/duplicating search criteria
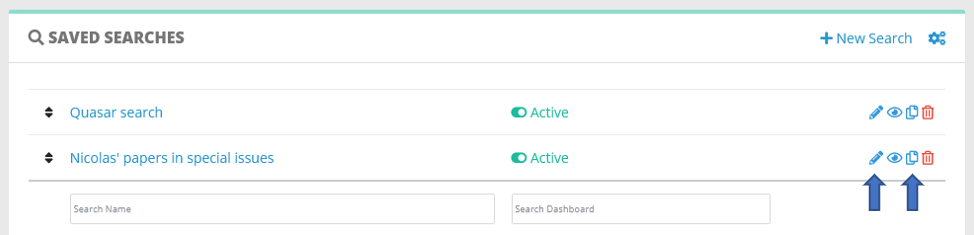
Saved searches can be conveniently edited and duplicated when necessary, using those two buttons:
Dashboards, status and counters
Nestor dashboards offer a quick overview of the journal activity, sorting articles by status and counting them.
- Red counters sum up articles where the due date is exceeded
- Green counters sum up articles where the due date is not exceeded
Standard dashboards
Every editor has access to:
- The saved searches area, which contains links to your favorite searches.
- The personal dashboard, listing the articles you are in charge of.

A brief overview of the workflow
The workflow has been divided into functional steps called statuses. For each status, Nestor expects a reply from the indicated user, and use the due date to calculate delays.
Below is a diagram of the Nestor workflow. Blue boxes represent editorial statuses: these will appear in your to-do list and require your attention! Starred statuses allow you to take the common actions:
- ask for a revision
- take a final decision
- or send the paper to the referees

Special dashboards
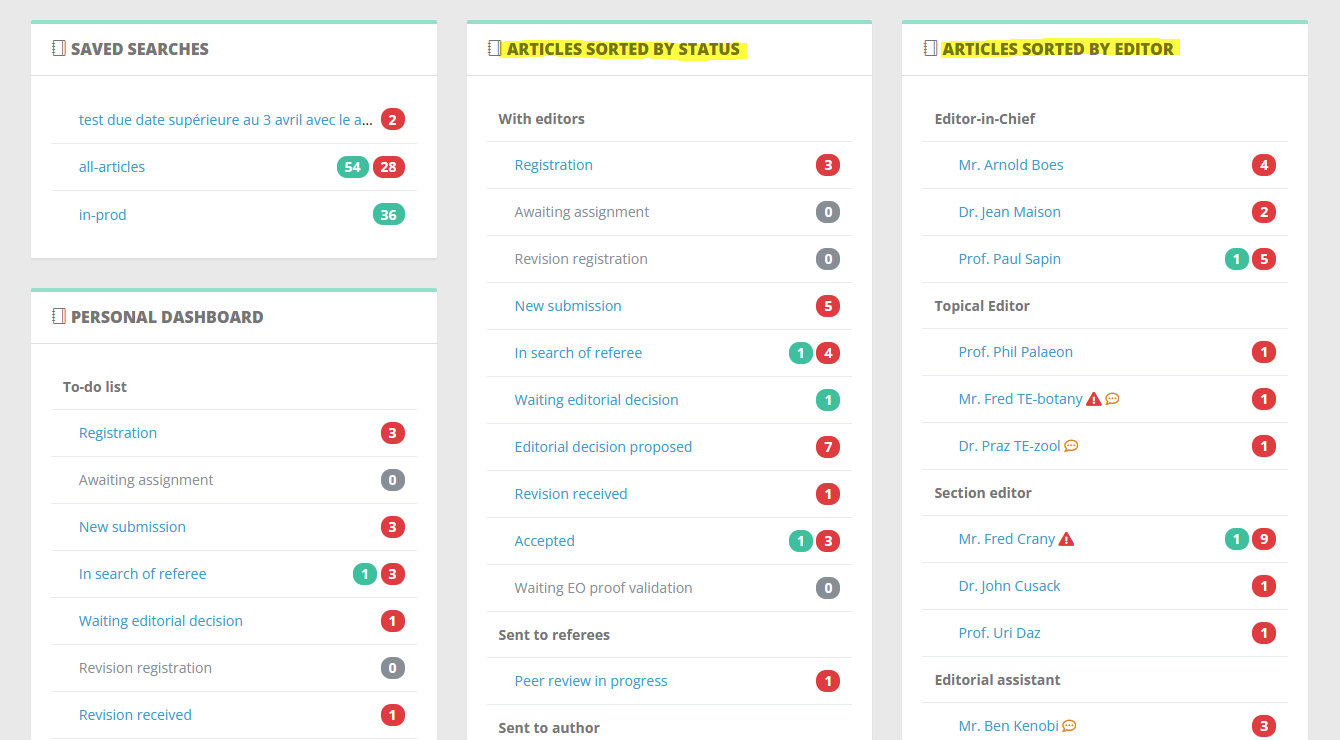
Additionally, and according to your profile rights, you may have access to
- A list of all articles sorted by status (more relevant for editorial offices)
- A list of all articles sorted by editors (usually used by editors-in-chief);
Articles lists: views and exports
Overview
From the dashboard, clicking on a status will lead you to the list of articles matching the status:
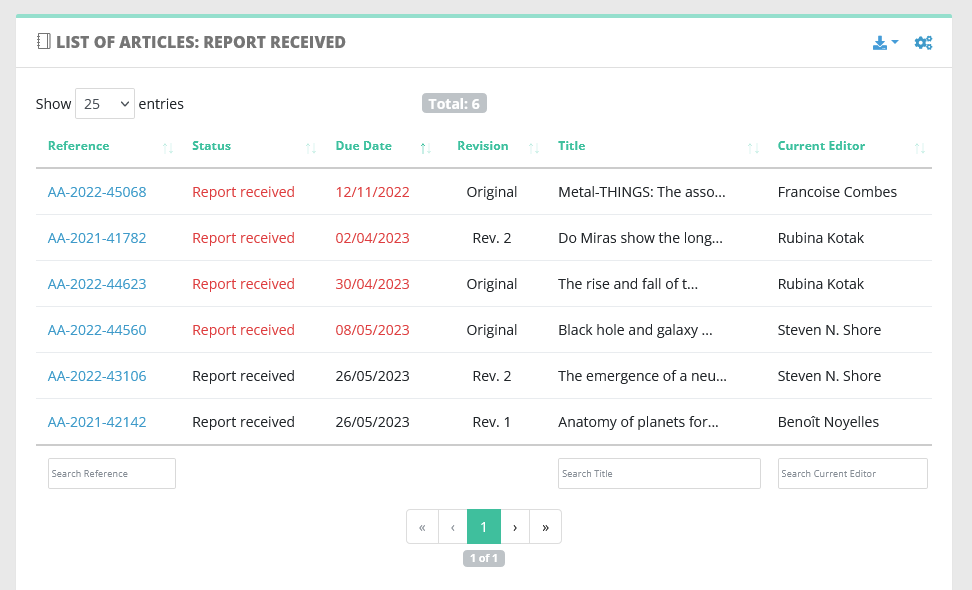
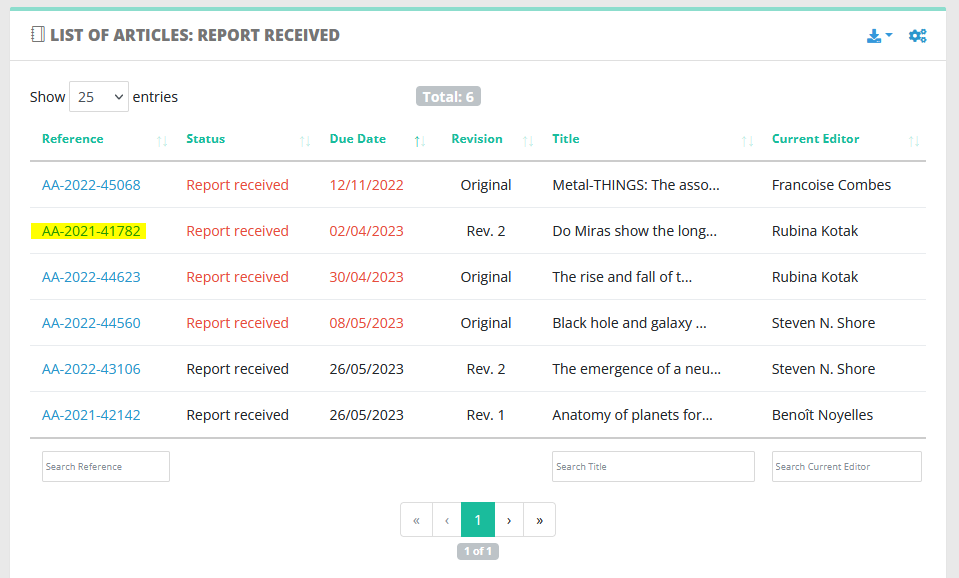
From this list, you can reach any article just by clicking on the reference. Articles with red statuses have their due date exceeded:
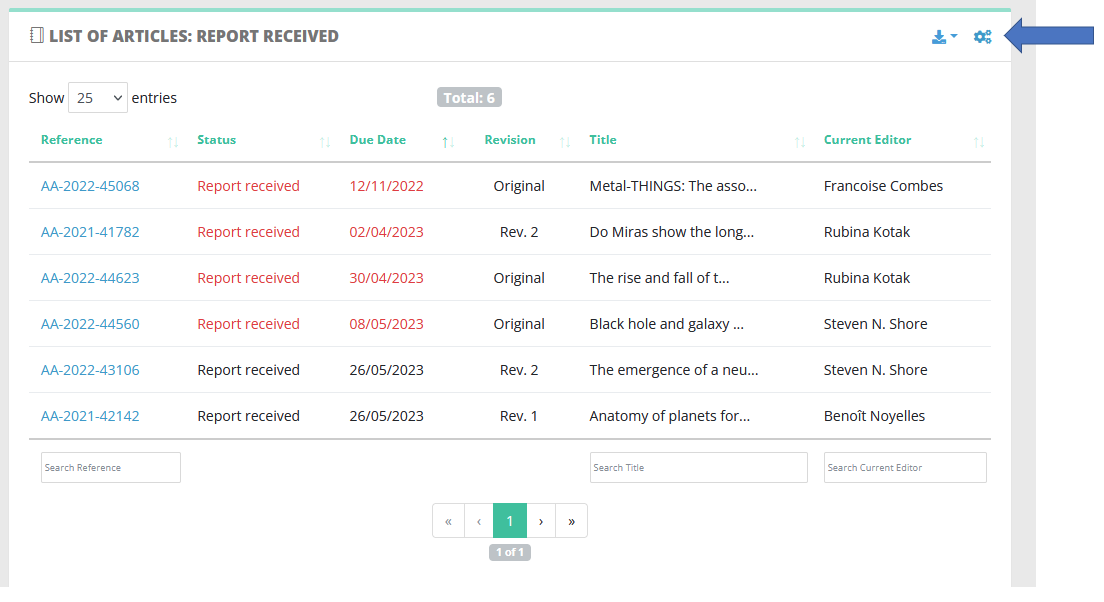
Customizing displayed columns
Columns can be customized to suit your needs:
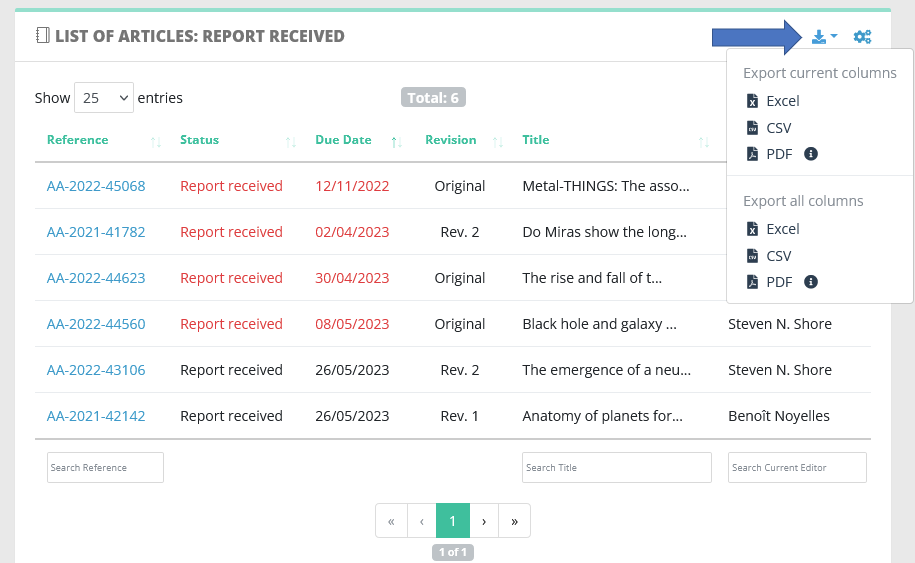
Exporting lists
Article lists can be easily exported using the export tool:
Presentation of the article page
Selecting an article will display the article information page. This page is divided into: * the upper area, containing the main information about the article * the lower area, containing information related to versions
Upper area: the main information
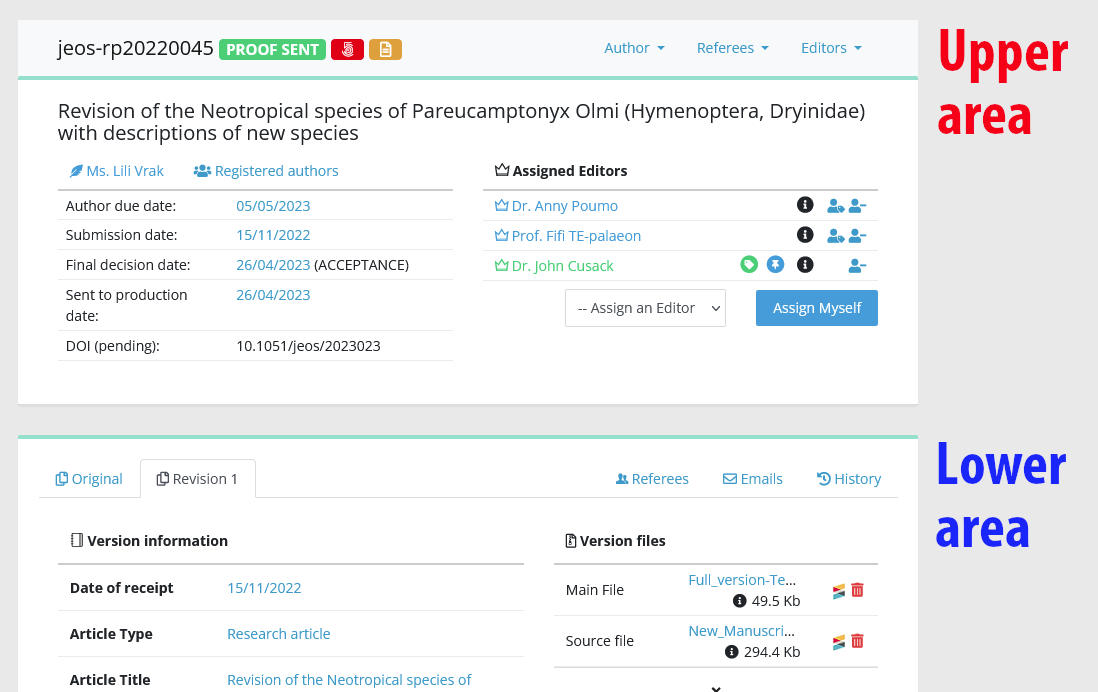
The main information module is located in the upper area. It contains the most important information about the manuscript:
- The reference, status and flags
- The quick actions tool bar
- The article title
- The authors linked to the article, and tools to manage them
- The editors linked to the article, and related management tools (if you are Editor-in-Chief)
- Dates, most notably the due date, which is used to send automatic reminders and display belated and urgent articles in dashboards
The quick actions toolbar
The quick actions toolbar is located in the upper part of the article page.
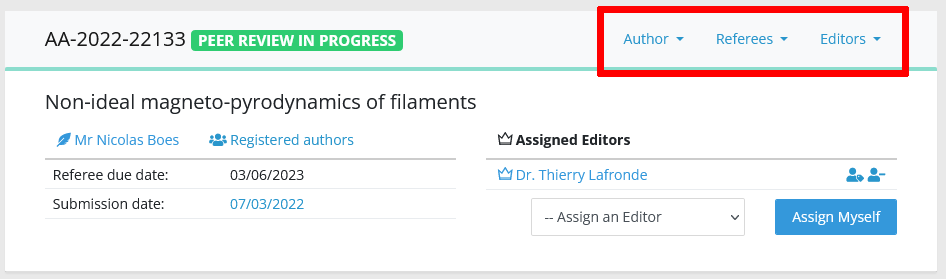
It contains quick shortcuts to manage the article. Note that available actions will depend on:
- the article status
- your own editor profile (see rights)
For instance if the article is in peer review, the toolbar will allow you to reach actions to manage referees easily without scrolling to the referee module.
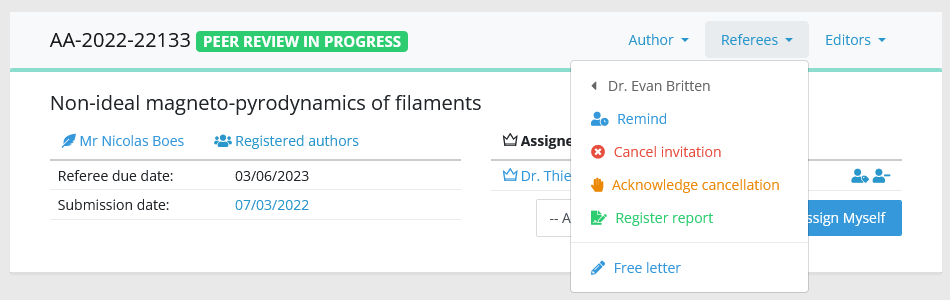
Likewise, you can send the editorial decision to the author directly from here.
The due date
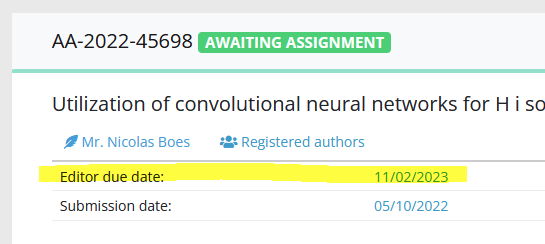
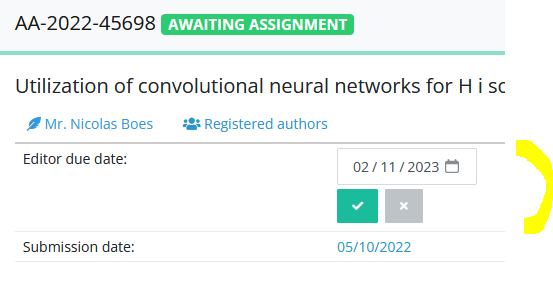
The due date is indicated in the upper part of the article page. The due date indicates:
- who must take action to move the article forward?
- when is the action due?
According to the article status, it is used:
- as a deadline for the editor to take a decision on the article
- as a deadline for the author to revise, when a revision has been requested
How does Nestor uses the due date?
Nestor uses the due date for two important features:
- highlighting delayed articles in dashboards (with red counters)
- sending automatic reminders
How is the due date computed?
The due date is computed automatically when the article changes status, using:
today's date + a number of days
The number of days depends on the article type and its workflow configuration. Some article types need faster processing times, so their due dates will be set earlier.
Can the due date be corrected?
Yes, the due date can be corrected!
- Automatically: the due date is corrected each time the article changes status
- Manually: the due date can be corrected just by clicking on it (if your profile allows it)
- Correcting the due date will prompt you to send an e-mail to the concerned person
- Typically, this happens when an author is granted a deadline extension to revise the paper.
Lower area: versions
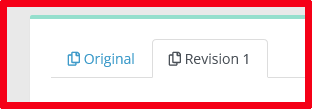
For each revision of an article, Nestor will create a new tab in the lower part.
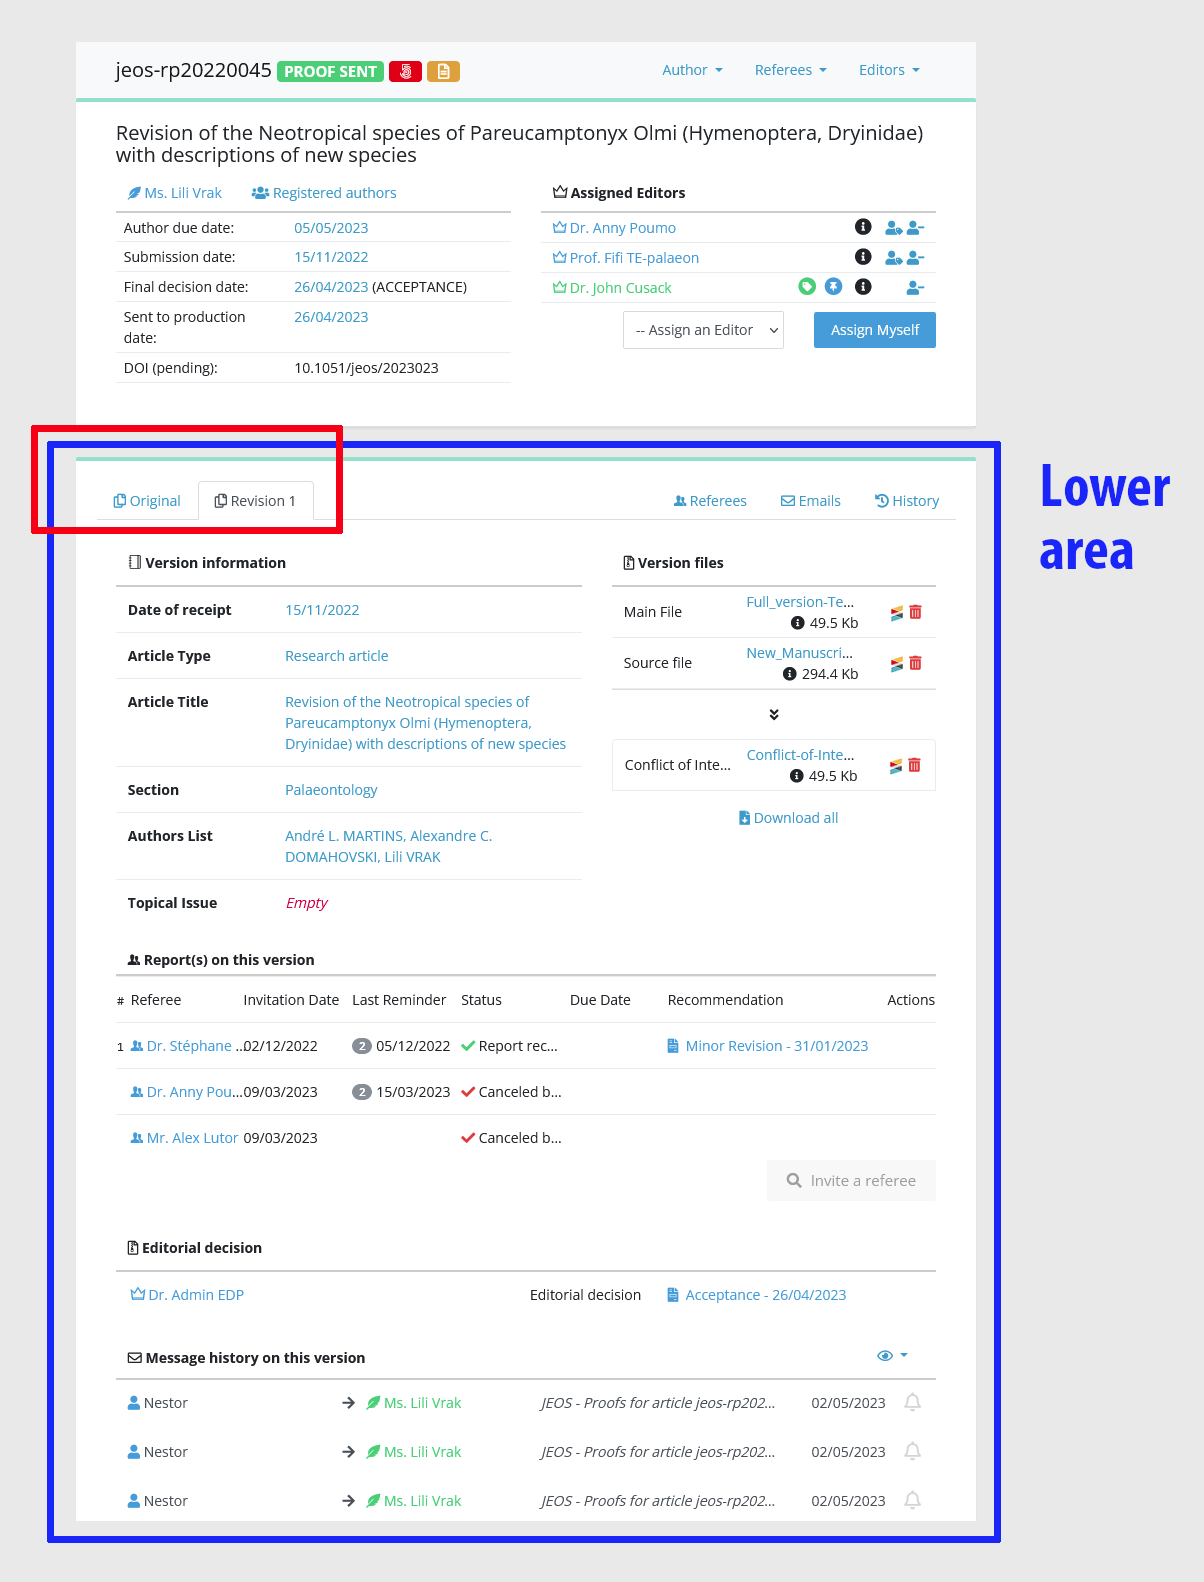
Information about the article is stored for each version. The specific modules of the lower area are described in the following pages:
- The metadata module
- The file management module
- The referee management module
- The editorial decision module
- The correspondence module
The metadata module
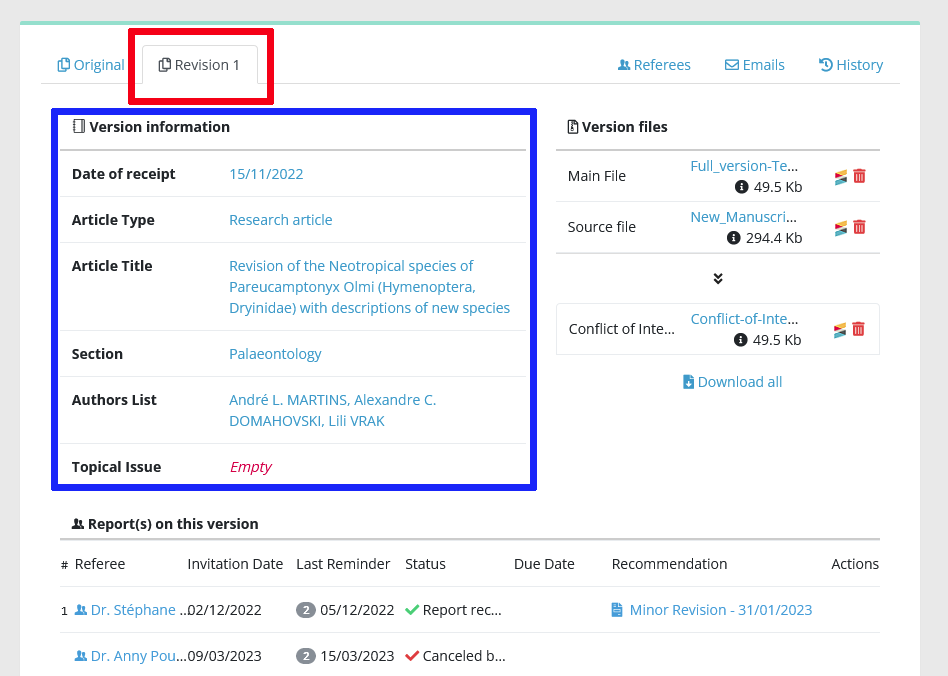
On the left hand are the metadata fields. Metadata fields are editable by clicking directly on the values. Note that metadata can be edited only on the last submitted version of the article.
Depending on the article type configuration, metadata can include:
- the date of receipt of this version
- the article title
- the authors list (in text, which may differ from the linked authors)
- standard categorizations
- custom fields
- free keywords
- Fundref information
The file management module
On the right hand side is the file management module, which lists all files submitted by the author for this version.
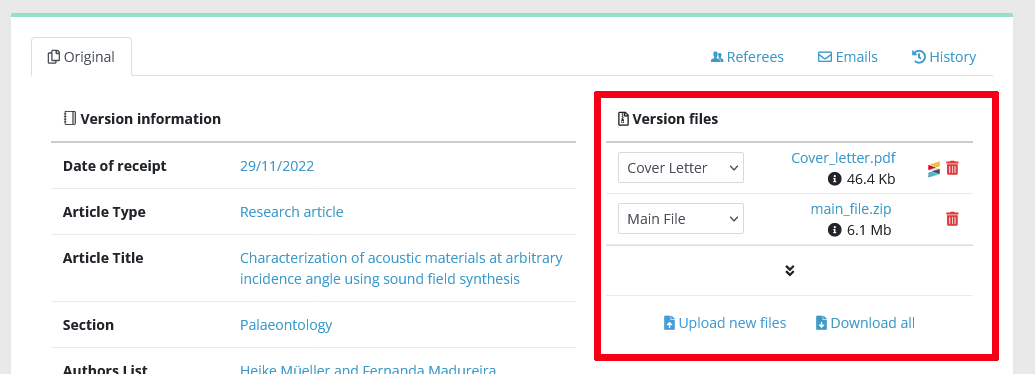
This module allows to:
- download a file (click on the file name)
- delete a file (click on the red bin)
- upload files (click on the “Upload new files“) button
- check the similarity report (if present)
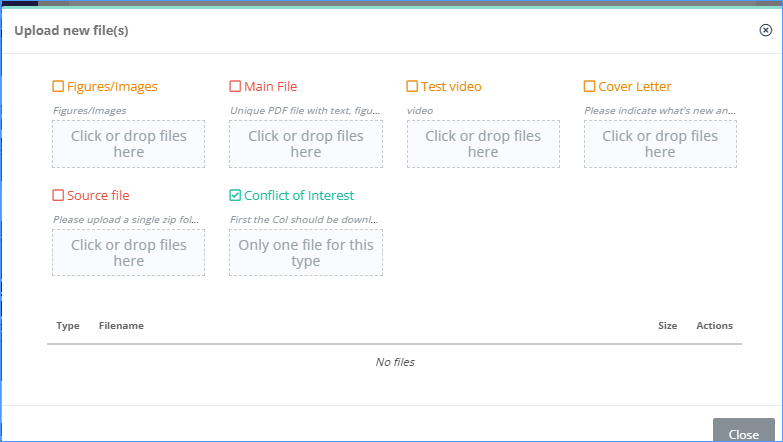
Uploading files will open a window proposing available file types for this article:
The referee management module
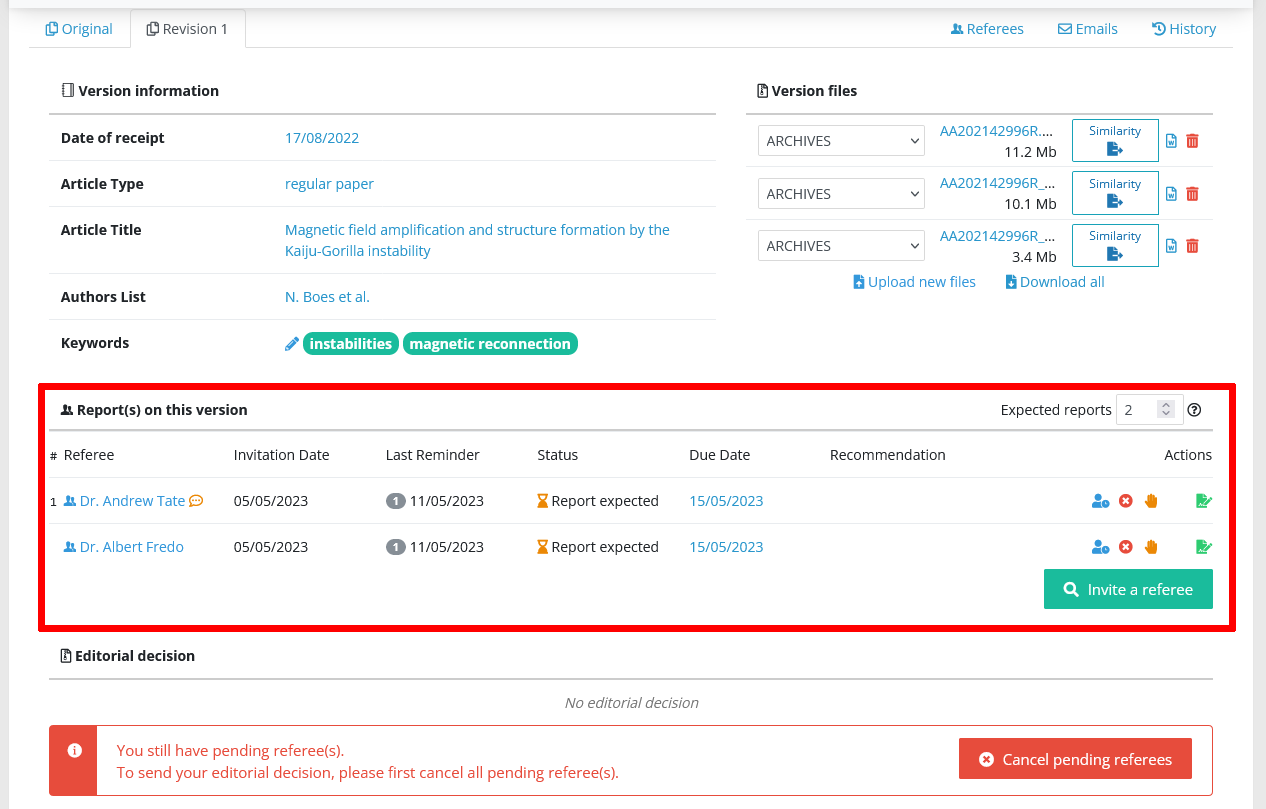
This is where you will invite referees, un-invite, send reminders, consult the reports, etc. (these actions are explained in detail here).
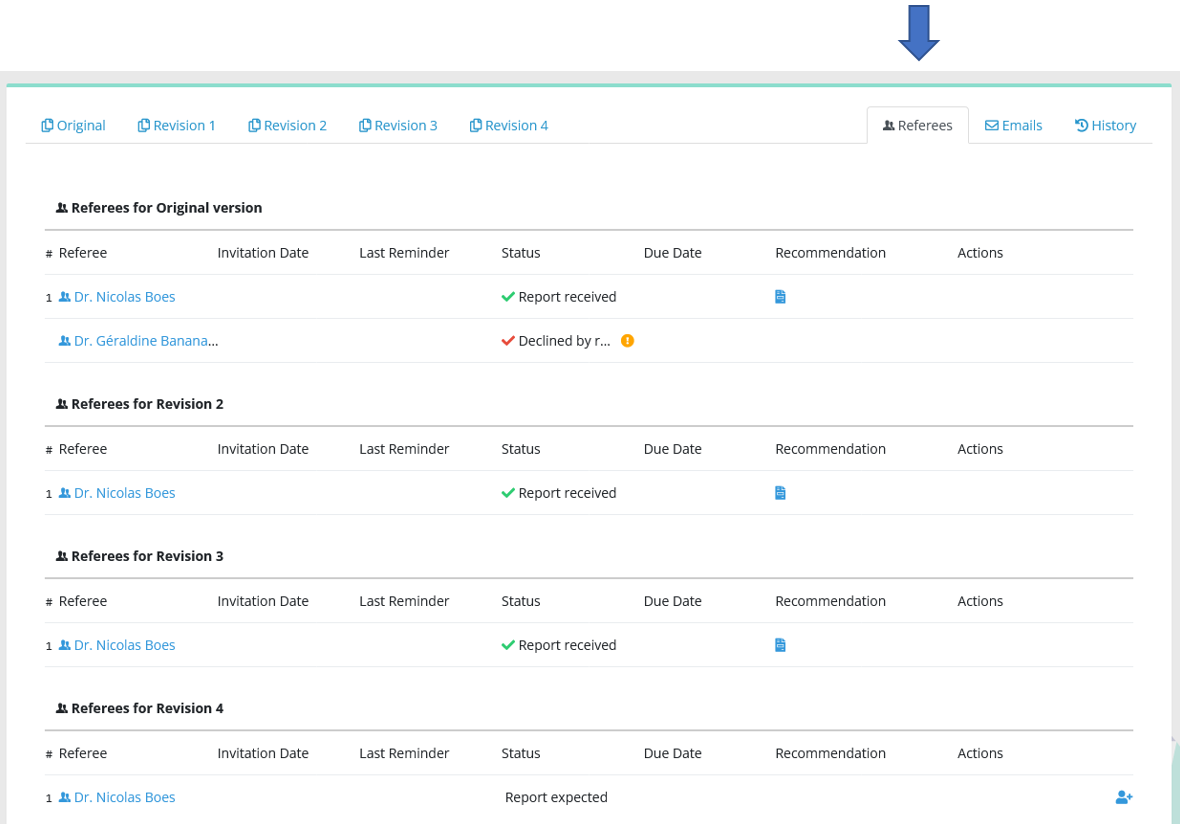
The information is related to each revision. If you want to have a global view of the referee process, please click on the referees tab on the right hand side of the page.
The editorial decision module
This is where you will propose or take the editorial decision, and consult it. Those actions are detailed here.
For each version, all proposal/decisions are stored in this module. Clicking on the recommendation will open the corresponding decision letter.

The correspondence module
All e-mails sent from Nestor are stored and accessible at any time.
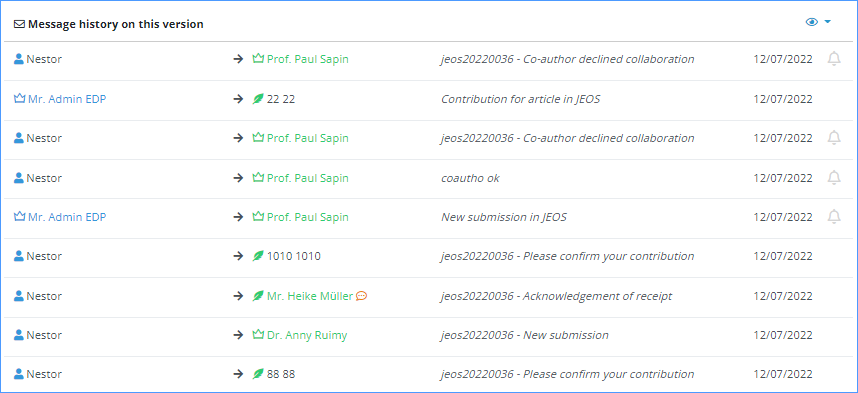
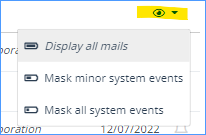
The list of messages can be shortened with the 'Masking menu', you can choose which kind of messages you want to hide.
Similarly to referee management, a global view of e-mails on all versions can be found in the Emails tab.

History tabs
Writing in progress... ↁ_ↁ
Any enquiries? please contact us: support@nestor-edp.org
Editor assignment and responsibility
This section details the assigment process and the concepts related to editorial responsibility: - Who is the current editor of an article, what are the consequences? - Who is the editor in charge? - How does editorial responsability switch from an editor to another?
Assigning editors
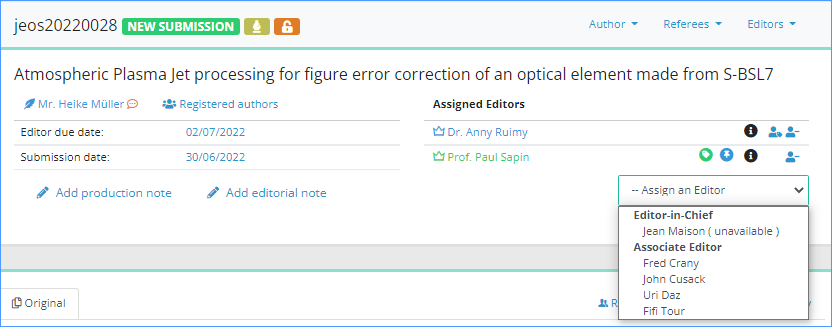
If you are an Editor-in-Chief, you will likely assign articles to other editors (e.g. Associate Editors, Guest Editors, etc.). Click on the ‘Assign an Editor’ menu and select the editor you want to assign. This opens the confirmation window, proposing you assignment e-mails:
|
Once you confirm sending the message, the following happens:
|
Additionally:
- if the article status was "Awaiting assignment"
- --> status changes to "New submission"
- if the assigned editor has a chargeable profile
- -->Nestor will also consider him as "editor in charge", which impacts his personal dashboard
Current editor & editor in charge
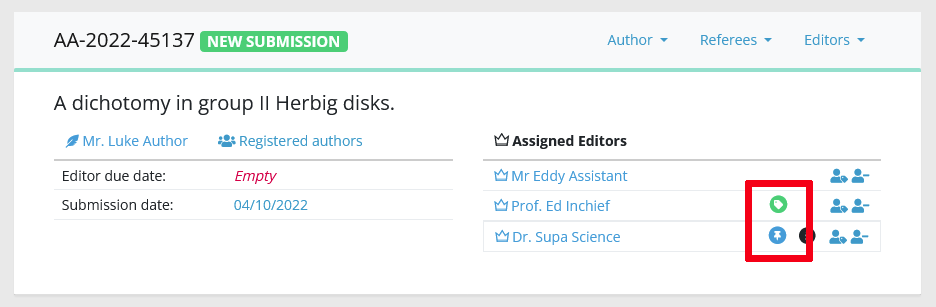
In the article:
- The "current editor" is highlighted with a green badge
- The "editor in charge" is highlighted with a blue badge
On a given article, there can be only one editor in charge, and one current editor. The same person can hold the two responsibilities at the same time.
In fact most of the time, the scientific editor is both "current" and "in charge". Depending on your workflow, this can change later on in the process. For example:
- The editor in charge proposes an acceptance to the Editor-in-Chief: the EIC is now current.
- The EIC accepts the article and pass it on to a copy editor, the copy editor is now current.
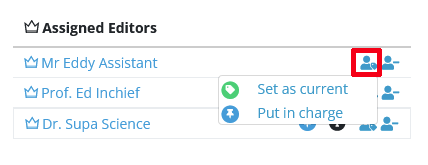
If necessary, editorial responsibility may be easily corrected with this tool:
Current editor and to-do list
The current editor is responsible for moving an article forward:
- The current editor is the default recipient of workflow notifications (eg referees declining, uploading a report etc)
- If an editorial action is expected (such as an assignment or a decision), the current editor is responsible for performing this action
- If an author or referee action is expected, the current editor is responsible for following through and remind the latecomers
In any event, the current editor is responsible of the timely processing of the manuscript, and make sure the workflow is not stuck.
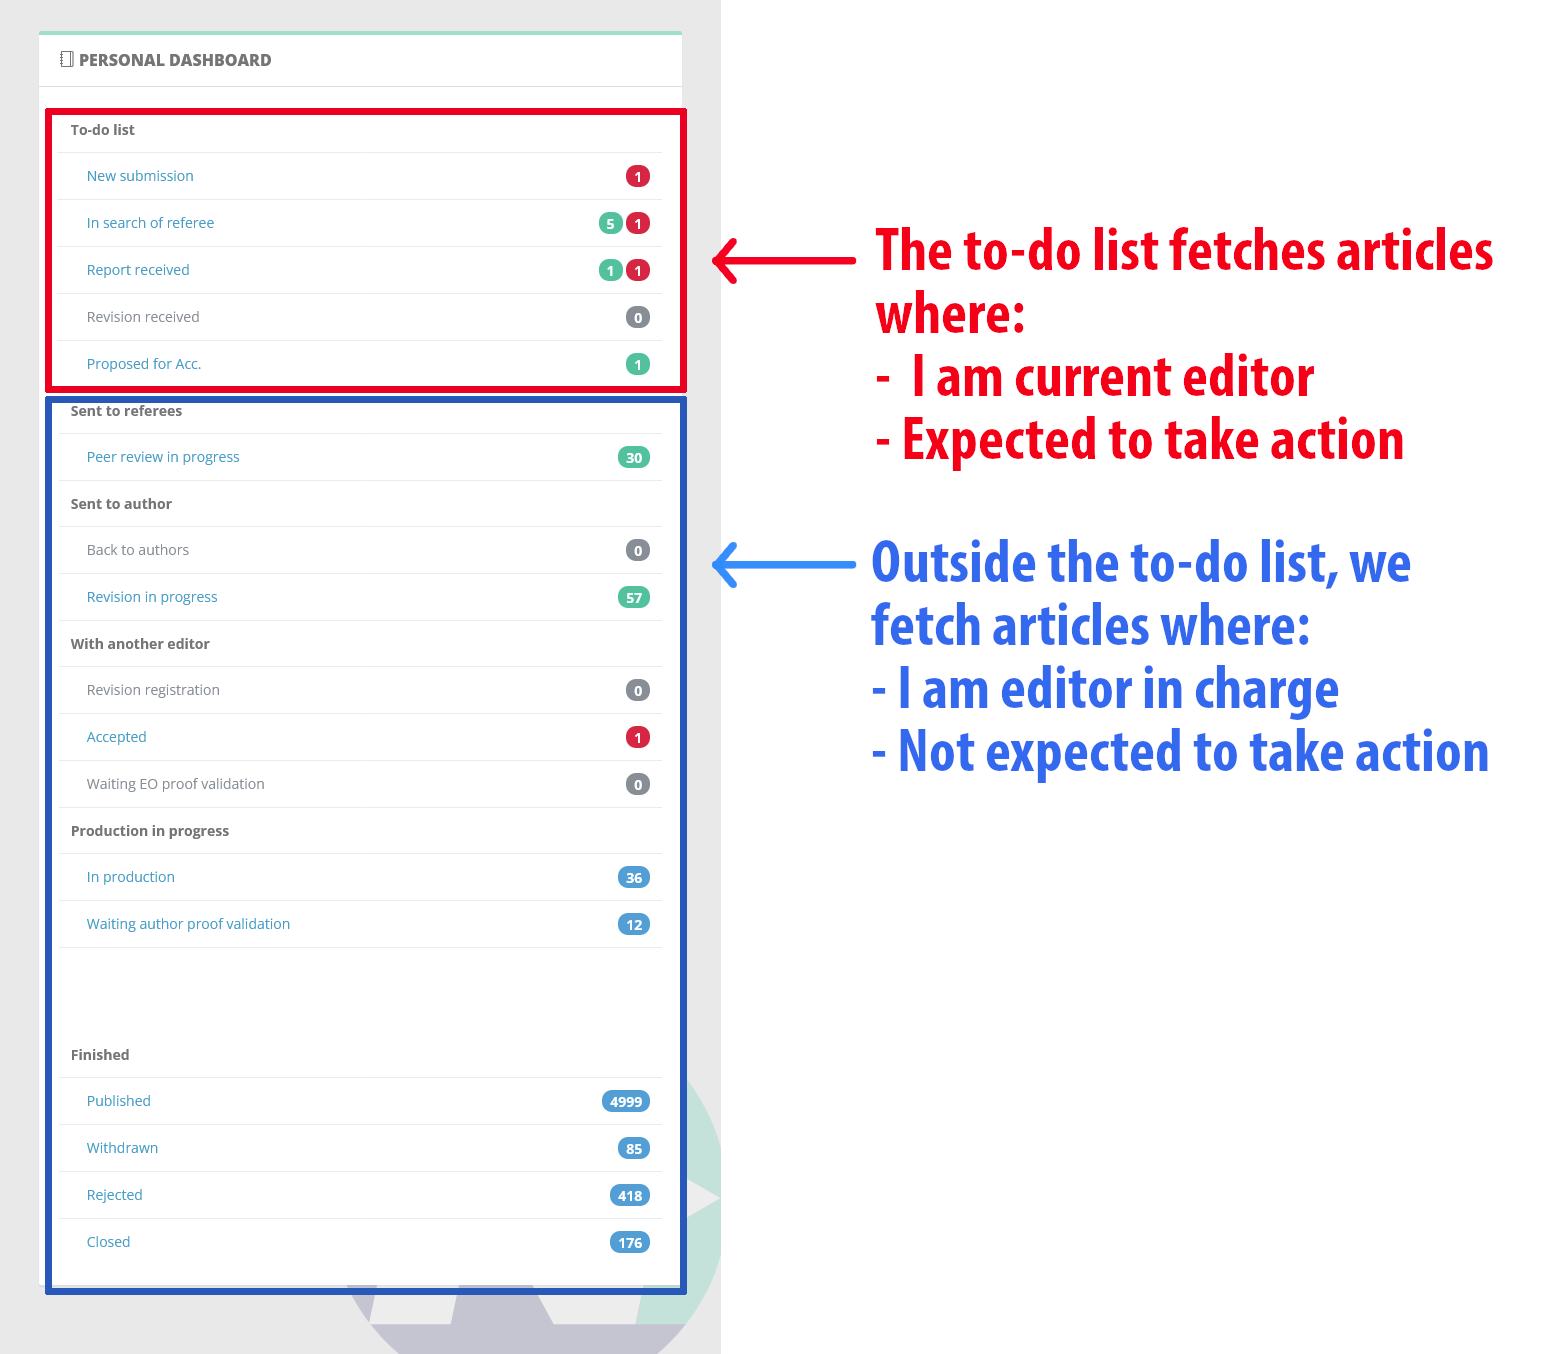
For this purpose, your personal to-do list keeps track of articles where you are current editor:
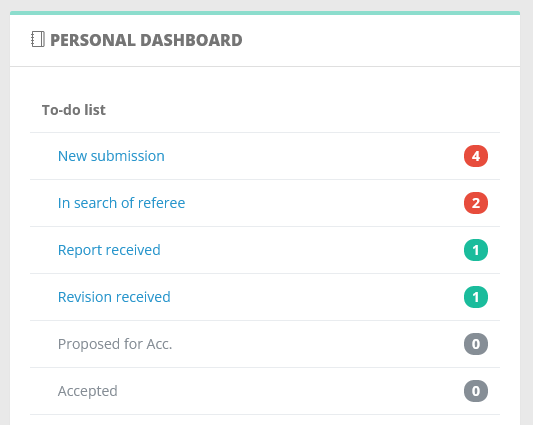
The to-do list helps you identify articles where an action is expected from you. NB Red counters keep track of articles where the due date is passed, please pay particular attention to them.
Editor in charge and personal dashboard
The editor in charge of a manuscript is responsible of the scientific evaluation, oversee the review process, and proposes the final decision. Contrary to the current editor, the editor in charge remains the same throughout the life of the article.
Let us consider the following examples:
- The editor in charge recommends acceptance to his Editor-in-Chief: the EIC is now current.
- The EIC accepts the article and pass it on to a copy editor, the copy editor is now current.
- Meanwhile, the editor in charge remained the same.
The editor in charge notion serves two purposes:
- Keeping track of who handled the scientific workload on an article (which is useful for searches, exports and statistics)
- Displaying relevant articles in one's personal dashboard (below, in blue):
How does editorial responsibility switch?
For a given article, editorial responsibility is indicated by the colored tags in the assignment module. Note that the editor in charge and the current editor can be the same person! In fact, this will be the case for most of the article life.
Becoming the "current editor"
Any editor assigned to an article immediately gets the green tag "current editor", and is responsible for moving the article forward. If you are current editor, this means:
- the article will now appear in your to-do list
- the article will disappear from any other editor to-do list
- your role is to make sure the editorial process moves forward ಠ_ಠ
Besides the standard switch described above, a proposal from an editor to his parent editor will also switch the responsibility: the parent editor will become "current", usually to take the final decision on the article.
Becoming the "editor in charge"
An editor gets the blue tag "editor in charge" when these conditions are fulfilled:
- the editor must be assigned to the article
- when assigned, his/her profile must be "chargeable" (see profile configuration).
Becoming editor in charge means you are now responsible of the scientific evaluation (ง •̀_•́)ง
Also, the article will appear in your personal dashboard (provided it is not already in your to-do list!).
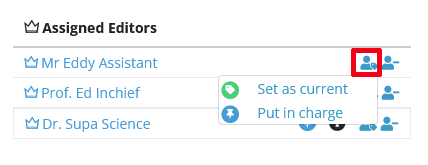
Correcting the editorial responsibility
Correcting the responsibility is straightforward, but your editor profile must allow you to do it! Correcting the editorial responsibility will impact the other editors' dashboards as described above. This is useful to ensure an article is being followed properly by the most relevant editor.
Peer review management
Finding/creating a referee
In the referee module, click on the ‘Invite a referee’ button.

You can search a referee using different criteria: e-mail address, last name, first name, or expertise fields if the journal uses them. For any search, please type in at least 2 letters and the system will display the relevant propositions. You may switch to classic search to use wild cards and filter referees precisely.

For each referee found, the system displays his/her activity. If you click on the link or on the user logo you will get more information. For confidential reasons, you are not allowed to access the papers that you were not put in charge of.

If the referee you’re looking for is not registered in the system, you can add and invite them with the link ‘add a new referee’.

When you have chosen the referee, click on the ‘Invite’ button, this will open the invitation pop-up window, where you can edit the invitation letter, or send it directly.
Uploading my own report on the paper
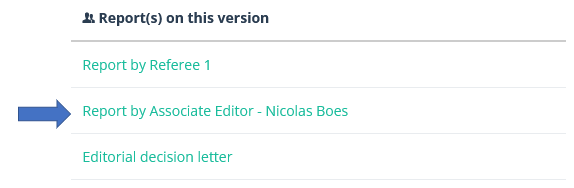
You can assign yourself as a referee on the paper. In this case, you will receive the usual referee link to upload your referee report, and the author will receive this report grouped with other referee reports.
Instead, please consider submitting an editor report.
The difference between a referee and an editor report is slim: the editor report is identified as such to the author, and is distinguished in the author interface:
Contact a suggested referee
In the referee module, click on the ‘Invite a referee’ button.

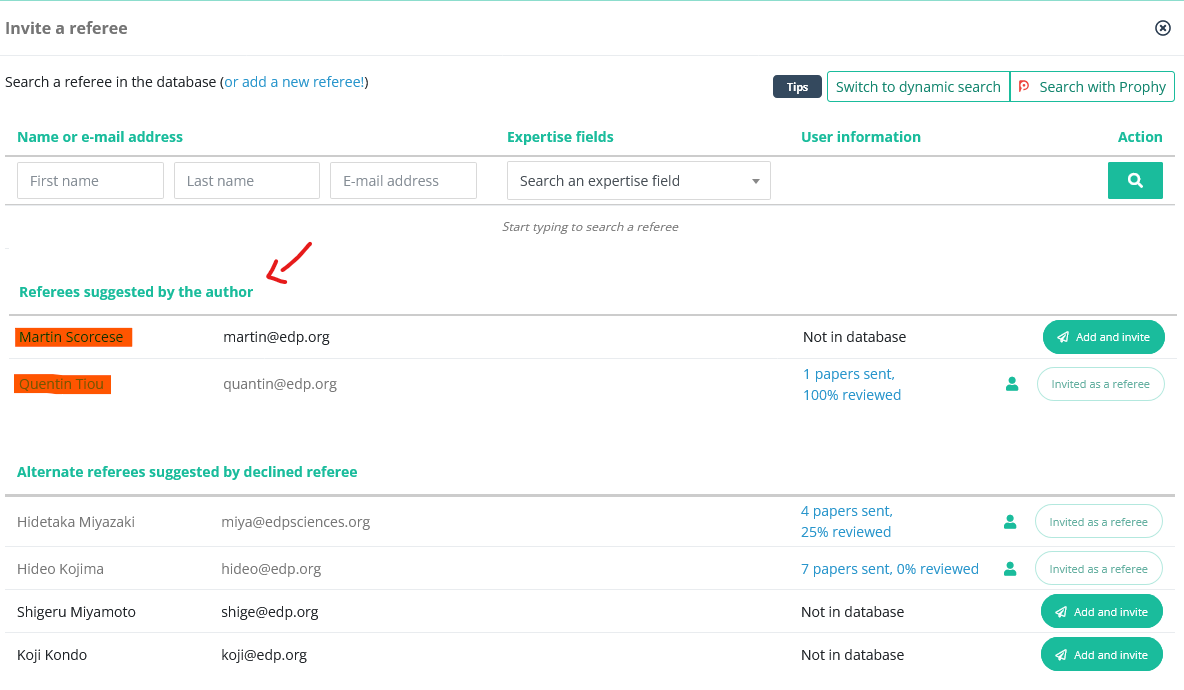
If the journal requests this information during submission, you will have the possibility to invite the referee(s) suggested by the author.
Declined referees can also suggest their own colleagues to help you find an appropriate expert:
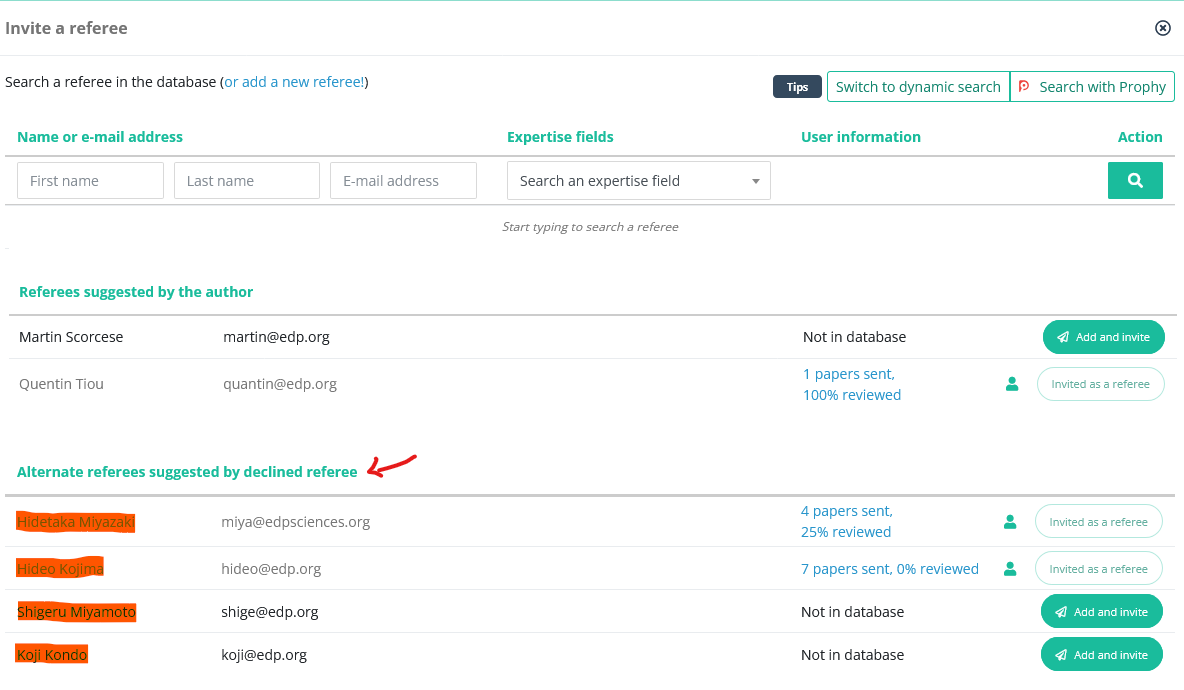
In any case, Nestor will check and inform you
- if the suggested referee is absent in the data base (in which case you will need to create the referee)
- or if the suggested referee has already been contacted to review the paper
Referee AI search with Prophy
Starting 2025, Nestor has a partnership with the Prophy referee finder tool! Prophy is configured on a journal basis: to activate the feature, please contact us at support@nestor-edp.org
Triggering Prophy
In the referee module, click on the ‘Invite a referee’ button.

In the invitation window, triggering the tool is straightforward:
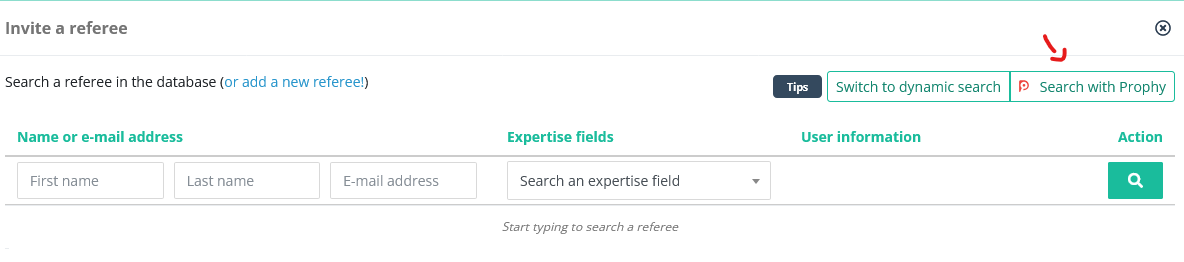
When clicking "Search with Prophy", Nestor will send the manuscript to Prophy who:
- performs a concept analysis on the manuscript
- based on this analysis, will return a list of 50 referees to evaluate the paper
Checking the list of suggestions
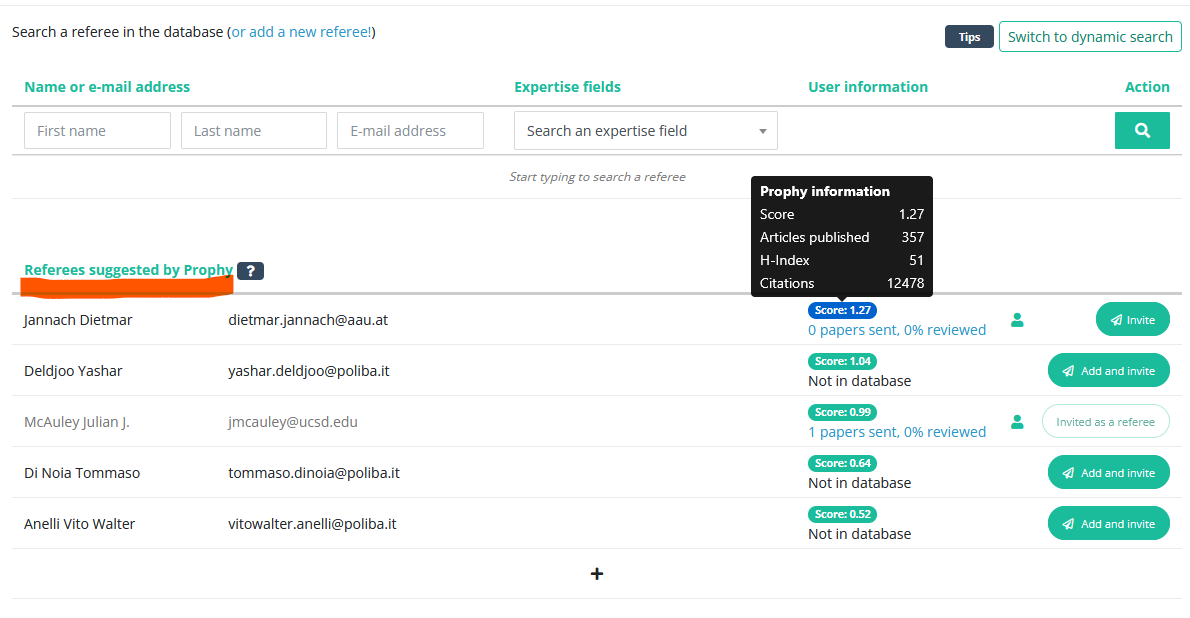
The list shows the first 5 referees. It is sorted by score, which represents the match between the manuscript's concepts and the referee's own papers. The higher the score, the higher the relevance of the referee to assess this paper.
From this interface, you can:
- click on each referee score to get more details on the referee
- invite the referee directly
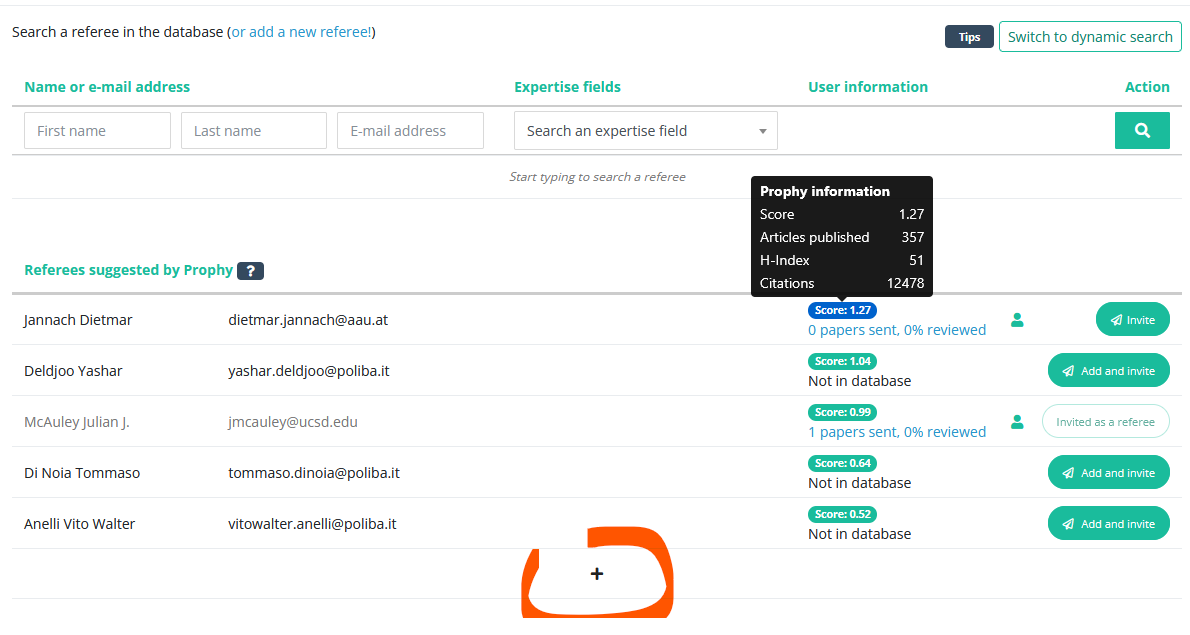
- can click on (+) to expand the list of suggestions
Managing invited referees
Actions on referees
Once a referee has been invited to review an article, it is listed in the referee module for this version.
The module keeps track of the status of each referee and proposes relevant actions to manage them:

Here is the detail of each action:
|
|
Remind the referee manually, the letter template content will adapt depending on the referee status. Note that automatic reminders may be active in your journal, please check with your Editorial Office. |
|
|
Cancel invitation if you no longer need this referee |
|
|
Acknowledge cancellation of the referee (if received outside of the system). Use with caution: as much as possible, referees should interact directly with the system. |
|
|
Acknowledge promised report from the referee (if received outside of the system). Use with caution: as much as possible, referees should interact directly with the system. |
|
|
Register a report manually (if received outside of the system). Use with caution: as much as possible, referees should interact directly with the system. |
|
|
Reinvite a canceled referee |


Number of expected reports and impact on article status
For each article type, a number of expected reports can be set:

This number determines the article status according to referees' answers:
- As long as the expected number of promised reports is not reached, the article will stay ‘In search of referee’ status.
- When the expected number of promised reports is reached, the status will switch to ‘Peer-review in progress’.
- Finally, once all expected reports are received, the status will switch to ‘Waiting editorial decision’.
The number of expected reports depends on the article type, but can be adjusted if necessary for each article. Adjusting the number of expected reports will automatically impact the article status as described above:

Reminders to referees
Reminders to referees may be either manual, or configured to be sent automatically. For each referee, Nestor keeps track of the last reminder date, and the number of reminders already sent.

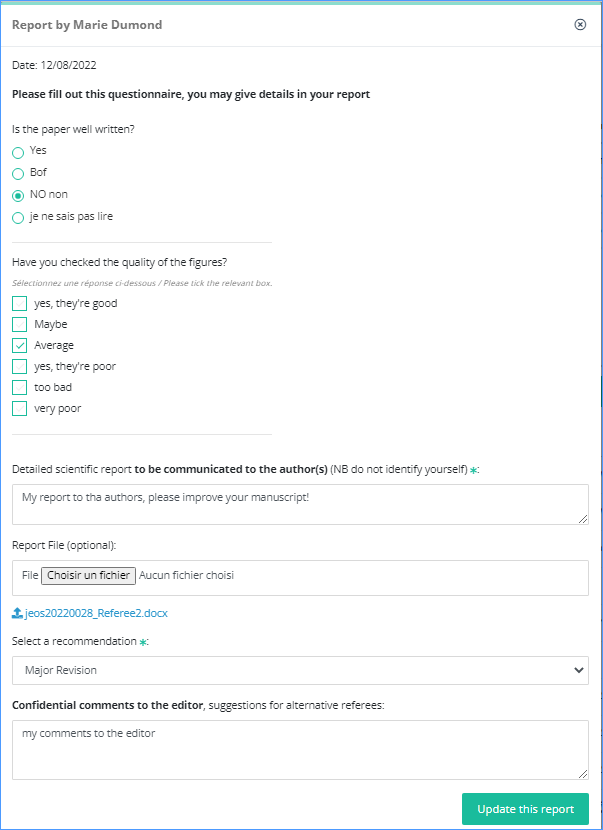
Checking/editing referee reports
Please click on the recommendation to open the referee report.
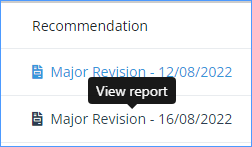
You can edit the referee’s questionnaire, comments and recommendation. You can upload a referee attachement (or replace it, if needed). In case the referee has uploaded more than one file, they will be available in a zip file.
Uploading my own report on the paper
You can assign yourself as a referee on the paper. In this case, you will receive the usual referee link to upload your referee report, and the author will receive this report grouped with other referee reports.
Instead, please consider submitting an editor report.
The difference between a referee and an editor report is slim: the editor report is identified as such to the author, and is distinguished in the author interface:
Editorial decisions and proposals
Taking the editorial decision
Accessing decisions
Once expected reports are received on a version, the article will switch to 'Waiting editorial decision'. This unlocks new actions in the decision module:


Proposals and decisions
Depending on the rights attached to your profile, you may propose or take a decision on a version.
- Proposing a decision will return the version to your parent editor, who must validate your proposal. For this purpose, he becomes current editor.
- Taking a decision will send the editorial decision directly to the author.
Sending the decision

Clicking on the recommendation will display the e-mail pop-up.
From here, you may edit your decision before sending the message. If you have gathered referee reports, they will be automatically inserted into your message.

Checking the decision
Once it is sent, your proposal/decision is stored on the article version for archival purposes.
If for any reason you need to change the decision, you can revert it. This will rewind the status (usually to ‘waiting editorial decision’) and you can choose another decision. All these actions will be documented and stored in the history tab.
Reverting a decision should be exceptional, to handle appeals and such. Use sparingly!

Submit an editor report
Additionally, before taking a decision, you may upload an editorial report on a version. Similarly to referee reports, their purpose is to store lenghty comments and enclosures, independently of the official decision.
